
Removing
1. Mark with paint the position of the rear wheels on the hubs. This will allow the assembly to set the balanced wheel in its original position.
2. Loosen the wheel bolts. In this case, the car must be on wheels.
3. Place the rear of the vehicle on jack stands and remove the wheels.
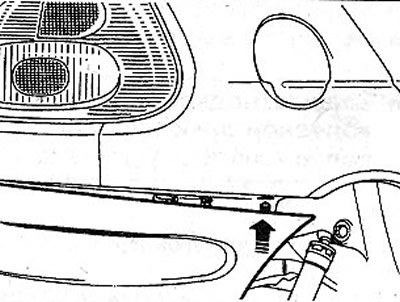
4. Open the trunk lid and unscrew bolts A (see illustration).

3.4 Open the trunk lid and unscrew bolts A
5. Unscrew on both sides of the car the bolts B of the wheel arch protection and the bolt C in the wheel arch (see illustration).
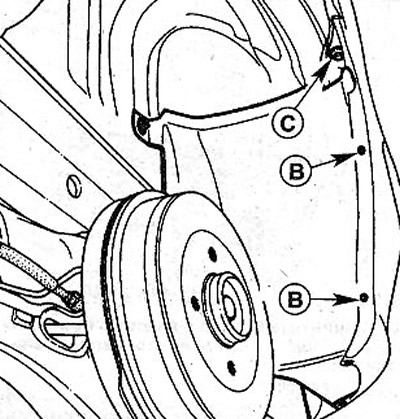
3.5 Unscrew on both sides of the car the bolts B of the wheel arch protection and the bolt C in the wheel arch
6. Remove bolts D and E from under the vehicle (see illustration).
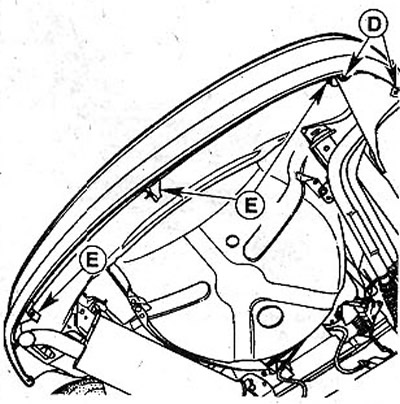
3.6 Remove bolts D and E from under the vehicle
7. Disengage side alignment pins (see arrows in illustration) and, acting together with an assistant, remove the bumper by pushing it back.
3.7 Disengage the side alignment pins and remove the bumper
Installation
8. Make sure that the flat nuts for the bolts E (see illustration 3.6) are in their places.
9. Make sure that the stops Ye GHe are damaged (see illustration). Replace if necessary. These stops are designed to center the bumper in relation to adjacent body parts.
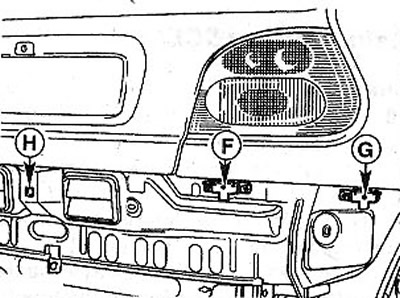
3.9 Check that stops F and G are not damaged
10. Install the bumper, acting together with an assistant, into place, while the centering pin must go into the hole H (see illustration 3.9).
11. Fasten the bumper with bolts in the recess under the trunk lid, below and in the wheel arches.
12. Establish back wheels according to the marks put at removal.
13. Screw in wheel bolts and lower the car. Do not grease wheel bolts.
14. Tighten the wheel bolts in a cross pattern to 90 Nm.