
Removing
1. Disconnect the door wire connectors by removing the retaining clip.
2. Unscrew the bolt A of the door opening limiter (see illustration).
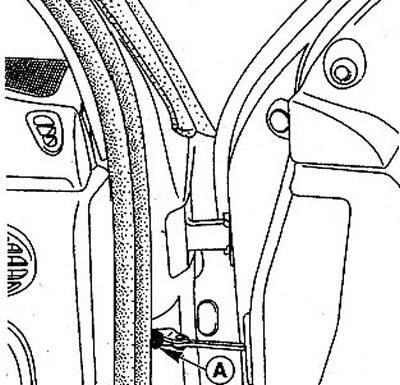
16.2 Remove bolt A of the door opening limiter
3. Remove the door hinge pins with pliers.
4. Have an assistant hold the door to prevent it from falling and knock out the fingers of both hinges with the CAR tool. 1055-02 FACOM or a suitable punch (see illustration).
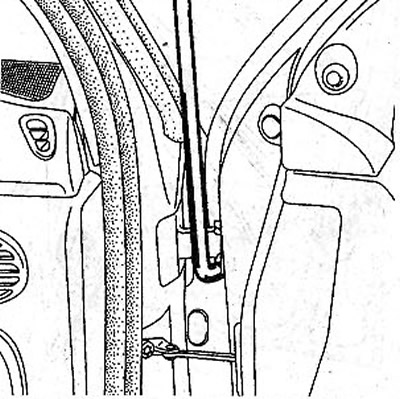
16.4 Knock out the pins of both hinges using the CAR.1055-02 FACOM tool or a suitable punch
5. Carefully remove the door, working together with an assistant, so as not to damage the paintwork of the body.
Installation
6. Insert the door into the hinges and insert the hinge pins, and then secure the retaining rings on the pins with pliers.
7. Screw in a bolt of the limiter of opening of a door.
8. Connect the plugs of the power wires and fix them.
9. Close the door and check the gap between the door and the doorway. The gap must run parallel and correspond to the nominal values. Otherwise, close the door.
Fit
10. Unscrew the bolts securing the lock bracket, having previously marked their mounting position with a felt-tip pen (see arrows in illustration).
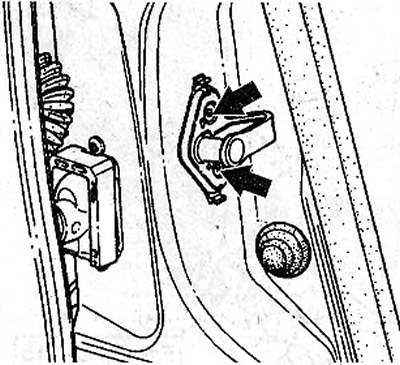
16.10 Unscrew the bolts securing the lock bracket, having previously marked their mounting position with a felt-tip pen (see arrows)
11. Close the door and measure the width of the gap, and then determine how much you need to move the door hinges.
12. Remove the door and loosen the bolts securing the hinges to the door post. Do not loosen the bolts securing the hinges to the door. After that, move the hinges to the desired distance and tighten the fastening bolts.
13. Replace the lock bracket, securing it with bolts according to the marks made before removal. Do not fully tighten the bolts so that the bracket can be displaced with some force.
14. Install the bracket so that the door closes easily.
Lock shackle adjustment
The door lock is adjusted so that when the door is closed, the door seals are under pressure, preventing air from being drawn in and water from entering the passenger compartment, as well as preventing the door from knocking while driving.
Over time, the rubber seals can shrink slightly, causing rattling or water intrusion. In this case, as well as when installing the door, it is necessary to properly adjust the position of the striker of the lock.
Adjustment
15. Loosen the bolts securing the lock bracket so that the bracket can be displaced with some force (see arrows in illustration 16.10). Pre-mark the mounting position of the mounting bolts with a felt-tip pen.
16. Feed the bolts inward and tighten them.
17. Carefully close the door if a new one was installed. The bracket will move to the correct position.
18. Carefully open the door so that the bracket does not move and tighten the bolts.
19. Close the door. The lock should close without applying this significant effort.