
Removing
Attention! To facilitate the laying of wires and washer hoses in the cavity of the trunk lid, it is recommended to fasten a string to their ends before removing them, which should remain in the lid. When installing the wire, it will be possible to stretch for this twine.
1. Disconnect the rear shelf leashes from the cover.
2. Detach the cover upholstery.
3. Disconnect the rear window washer hose.
4 Disconnect the multi-pin plug and release the wiring harness.
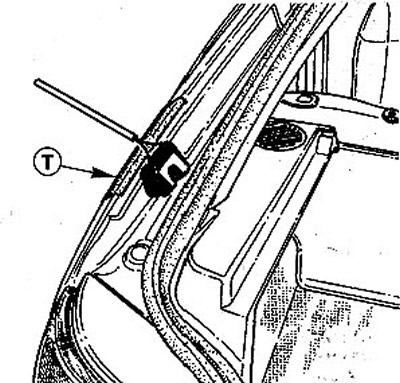
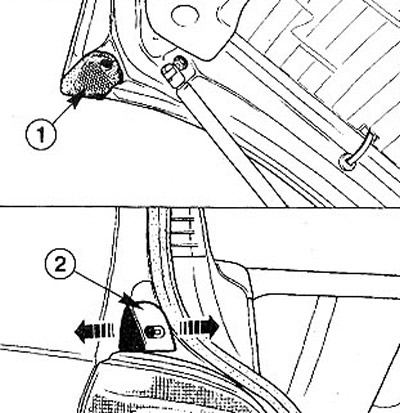
5. Disconnect the gas-filled stop I of the trunk lid from the cover by pressing out the latch 2 with a screwdriver 3 (see illustration).
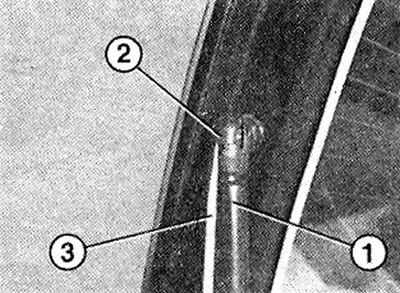
10.5 Disconnect the gas-filled stop 1 of the trunk lid from the lid by pressing out the lock 2 with a screwdriver 3
6. Have an assistant support the lid.
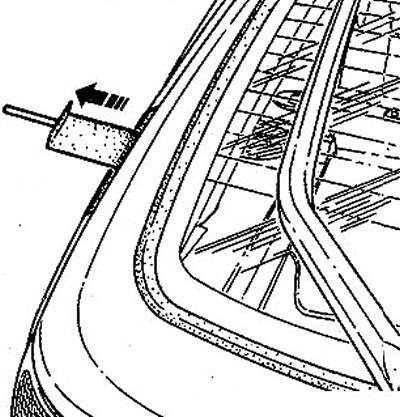
7. Remove the two plugs covering the bolt holes for the cover hinges on the roof rail (see arrow in illustration).
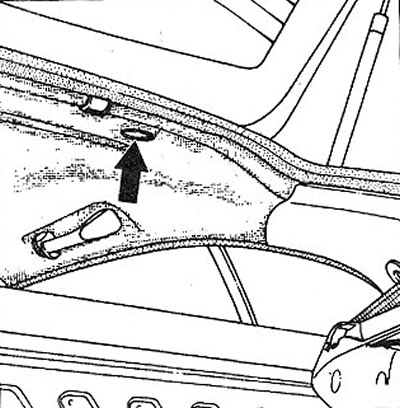
10.7 Remove the two plugs covering the bolt holes for the cover hinges on the roof rail (see arrow)
Attention! To facilitate subsequent installation, mark the mounting position of the nuts of the trunk lid hinge bolts with a felt-tip pen.
8. Unscrew the two hinge nuts and remove the trunk lid.
Installation
9. Hinge the lid.
10. Replace the gas-filled stop of the hinged trunk lid.
11. Pull the washer fluid supply hose and wire harness into the cavity of the cover with twine.
12. Connect the washer fluid hose to the jet.
13. Connect the multi-pin plug and secure the harness in the clamps.
14. Insert the grommet into the hole on the cover for the wiring harness and washer hose.
15. Close the trunk lid and check its position. Fit the cover if necessary.
16. Replace the cover upholstery.
17. Attach the rear shelf hangers.
18. Replace the cover-to-roof cross-beam bolt hole plugs.
Installing and adjusting the new folding trunk lid
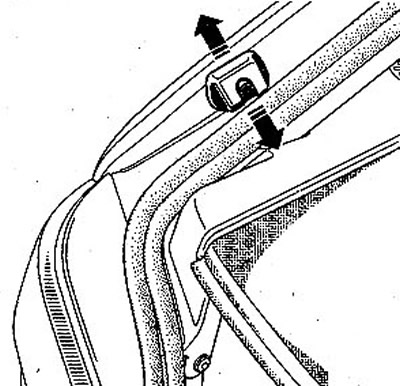
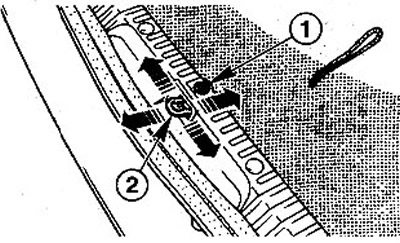
19. Loosen the bolts securing the cover lock bracket so that the bracket can be displaced (see illustration).
10.19 Loosen the bolts securing the lid lock bracket so that the bracket can be displaced
20. Close the lid and check the gap between the edge of the lid and adjacent body parts. The gap must be parallel and correspond to the nominal dimensions.
21 Remove the plugs from the bolt holes that secure the cover to the roof cross member.
22. Loosen the bolt of each hinge of the cover and fit the cover relative to adjacent parts in the longitudinal direction.
23. Tighten both cover hinge bolts.
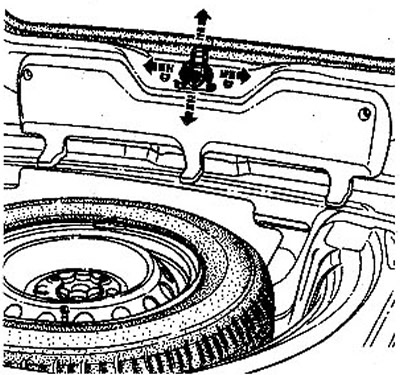
In order to equalize the protrusion of the cover relative to adjacent parts, loosen the side stops on the body and move them down (see illustration).
10.23 In order to align the protrusion of the cover with adjacent parts, loosen the side stops on the body and move them down
24. Carefully close the lid and, moving the lock bracket, equalize the position of the lid.
25. Carefully open the cover so that the bracket does not move, and tighten the bracket mounting bolts. The lid should close easily and the gaps should match the nominal ones.
26. Straighten the position of the side stops of the cover. To do this, paste over the body with adhesive tape T to protect the paintwork from damage and grab the loose stop with a wire loop (see illustration).
10.26 Tape the body with tape T to protect the paintwork from damage and grab the loose stop with a wire loop
Attention! If the boot lid stops are not installed correctly, the lid may subsequently become warped and the lid lock loosened.
27. Close the trunk lid by placing a strip of paper between the stop and the lid on both sides (see illustration).
10.27 Close the trunk lid by placing a strip of paper between the stop and the lid on both sides
28. Pull on the wire loops and move the stops until they touch the lid. Strips of paper should easily pull out from under the lid. The paper should not tear. The pores are designed to absorb the shock of the lid when it is closed and should not fit snugly against it.
29. Open the cover and tighten the stop bolts.
30. Replace the cover-to-roof cross-beam bolt hole plugs.
31. Close the lid. The lock should click securely without much effort.
SCENIC and Grandtour cars
The trunk lid for SCENIC cars is removed and installed in general in the same way as for MEGANE cars with a body «sedan». Below are just the differences.
32. Remove the bottom cover trim by turning both clips 1/4 turn to the left with a flathead screwdriver or coin.
33. Remove the rubber grommet 1 of the wiring harness by prying it out with a plastic wedge, e.g. HAZET 1965/20 (see illustration).
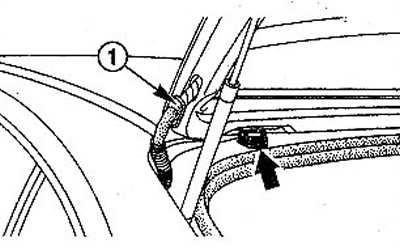
10.33 Remove the rubber grommet 1 of the wiring harness by prying it out with a plastic wedge, e.g. HAZET 1965/20
34. Disconnect the power wire from the optional brake light.
35. Disconnect the rear window washer hose from the right side of the cover. If necessary, first remove the rubber seal on this side.
36. Apply a small amount of sealant to the hinges before installing the cover. RENAULT recommends a sealant for this «IXELL».
37. Loosen the bolt 1 fastening the bracket 2 so that it can be displaced if it is necessary to straighten the position of the cover and ensure proper locking (see illustration). The bottom cover does not need to be removed.
10.37 Loosen the bolt 1 fastening the bracket 2 so that it can be moved if necessary to straighten the position of the cover and ensure proper locking
38. Bolt stop buffers 1 on the cover (see illustration).
10.38 Bolt stop buffers 1 to the cover
39. Fasten the stop buffer 2 to the rear wing without tightening it with much force so that the buffer can be moved (see illustration 10.38).
40. Fit the trunk lid by moving the hinges so that the gaps to the rear fenders are parallel and 4.5 mm wide. The closed cover must fit snugly against the seal.
The installation of the side stops is carried out in exactly the same way as for vehicles with a body «sedan».