
Removing
1. Remove the trim at the mounting location of the side rear-view mirror by prying it with a wide screwdriver (see illustration).
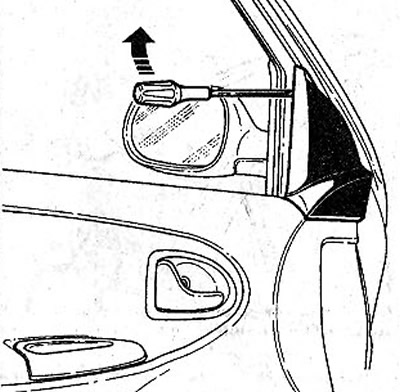
17.1 Remove the trim at the mounting location of the side rear-view mirror by prying it with a wide screwdriver
2. Remove the speaker cover by prying out the latches A with a screwdriver (see illustration).
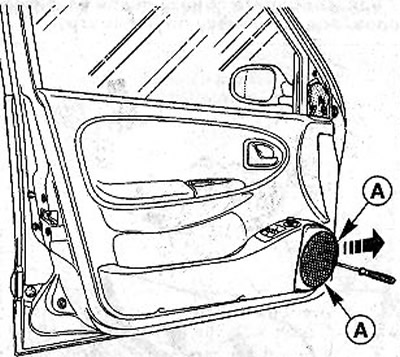
17.2 Remove the speaker cover by prying out the latches A with a screwdriver
3. Remove screws A (long) and B (short) with a T20 screwdriver and lift the door pocket to remove it from the dowel pin (see illustration).

17.3 Remove screws A (long) and B (short) with a T20 screwdriver and lift the door pocket to remove it from the dowel pin
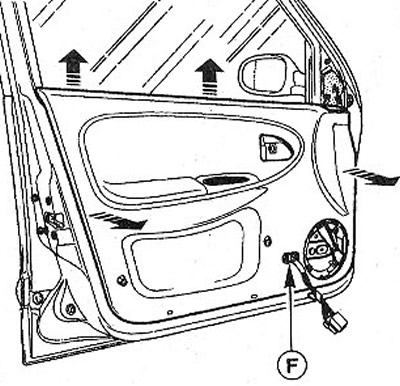
4. Disconnect the wires from the power window switches, if any, and remove the pocket.
5. Remove the window regulator handle. Sometimes the handle sits quite tightly on the axis. In this case, make a suitable fork (see illustration), which is inserted between the handle and upholstery and remove the handle. Place a rag under the plug so as not to damage the door upholstery. To increase the detachable effect, a wooden wedge can be placed under the fork (see illustration 17.5).
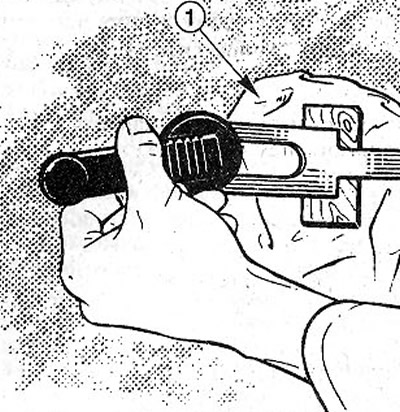
17.5 Make a suitable fork, which is inserted between the handle and upholstery and remove the power window handle
6. Stick on the cap of the screw C with adhesive tape and thus remove the cap (see illustration).
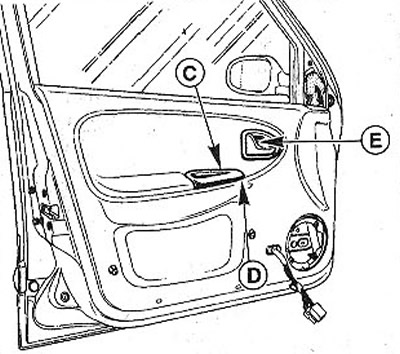
17.6 Apply adhesive tape to the cap of screw C and thus remove the cap
7. Remove the trim D of the opening on the armrest of the door by unscrewing the fastening screw from the T20 screwdriver (see illustration 17.6).
8. Unscrew the screw securing the trim E of the opening for the inner door handle with a T3O screwdriver and remove the trim (see illustration 17.6).
9. Release the door upholstery from the clips by prying up the upholstery around the perimeter. For these purposes, the FACOM D.115 or HAZET 799-5 fixture is suitable (see illustration).
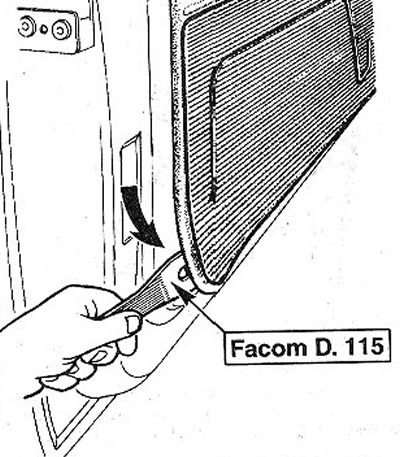
17.9 Release the door upholstery from the clips by prying up the upholstery around the perimeter
10. Remove the upholstery. The upholstery sealant can be cut with a knife.
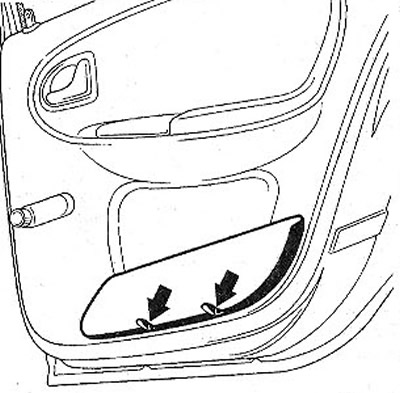
11. Release the upholstery from under the window opening seal by pushing it up (see arrows in illustration).
17.11 Release the upholstery from under the window opening seal by pushing it up
12. Remove the plug. Pull the wire with the plug through the hole in the upholstery (see illustration 17.11).
Installation
13. Apply the missing sealant to the sealing surfaces or apply a new one. If the upholstery is not sealed in this way, it can seep through the interior while driving. For sealing, it is recommended to use sealant with article number 7701 423 330.
14. Pull the power window wire and plug through the hole in the upholstery (if the car is equipped with power windows) and close the hole with a plug.
15. Fix an upholstery of a door with clamps. Striking the upholstery with your palms, achieve a firm fit of the door in the latches, and press the places with sealant to the door.
16. Install the door handle trim and handle by screwing in the mounting screw.
17. Connect the power plug of the power window to the connector on the door, which is closed by a pocket.
18. Replace the door pocket and speaker grille.
19. Put on an axis the handle of a window regulator so that it at completely raised glass was located vertically upwards. Stuff the handle onto the axle with palm strokes.
Upholstery of the rear side door
The pocket on the back door does not come off.
20. Right rear door. Unscrew those two screws with a T20 screwdriver on the door pocket (see illustration).
17.20 Unscrew the two screws with a T20 screwdriver on the door pocket. Right rear door
21. Get the top of the upholstery under the window frame seal, and also clamp with two brackets D under the window (see illustration).
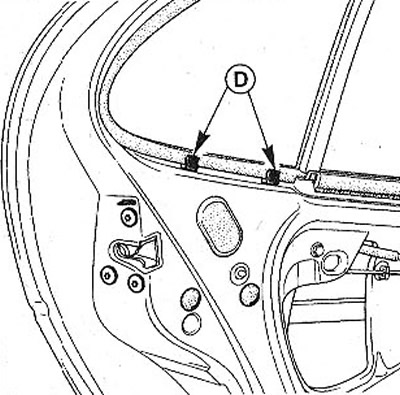
17.21 Insert the top of the upholstery under the window frame seal, and also clamp it with two clamps D under the window vent