English Русский
Български
Беларускі
Український
Српски
Hrvatski
Română
Polski
Slovenský
Magyar
Bookmark Contacts Articles Sitemap
Company vehicles Peugeot Company vehicles Opel Company vehicles Skoda Company vehicles Land Rover Company vehicles Mitsubishi Company vehicles Volkswagen Company vehicles Honda
RenaultBook.ru


Duster   Fluence   Kangoo   Laguna   Logan   Megane   Sandero   Scenic   Symbol   Clio   Other
Sandero 1 (2007-2012, petrol)

Oil pump repair (Renault Sandero 1)

  • Main
  • Sandero
  • Sandero 1 (2007-2012, petrol)
  • Power unit
  • Lubrication system
  • Oil pump repair
0
You will need: a TORX TZO key, pliers, a caliper, and a set of flat feeler gauges.

You will need: a TORX TZO key, pliers, a caliper, and a set of flat feeler gauges.


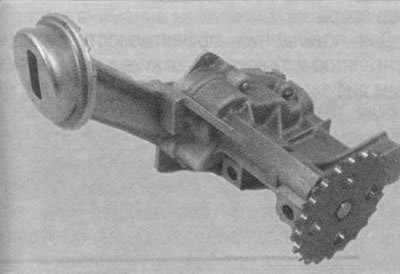
1. Remove the oil pump from the vehicle (see "Removal and installation the oil pump").

2. Drain the oil from the pump.
2. Drain the oil from the pump.


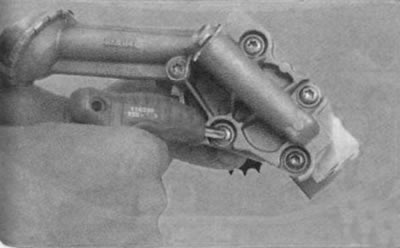
3. Remove the five screws securing the oil pump cover...
3. Remove the five screws securing the oil pump cover...


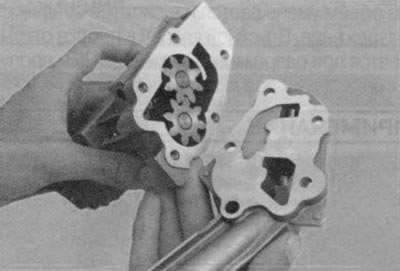
4. ...and remove the cover.
4. ...and remove the cover.


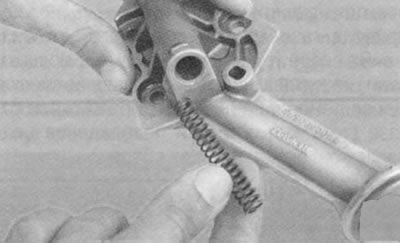
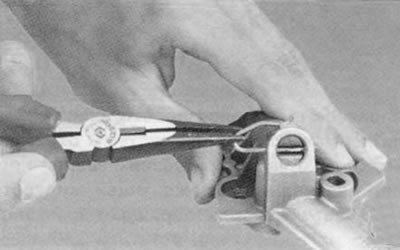
5. Remove the pressure reducing valve spring retainer.


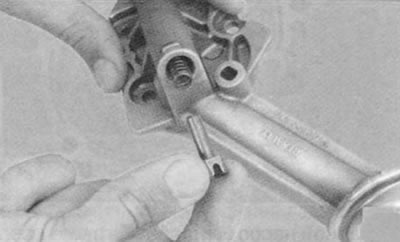
Warning: The pressure reducing valve spring is installed with tension. To avoid the spring "shooting" and causing injury, remove the retainer very carefully and hold the spring stop.

Warning: The pressure reducing valve spring is installed with tension. To avoid the spring…


6. Remove the spring stop...

6. Remove the spring stop...


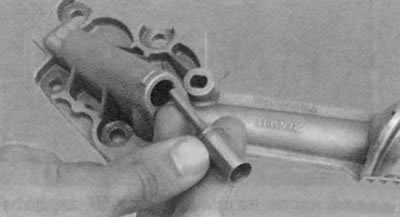
7. ...spring...
7. ...spring...


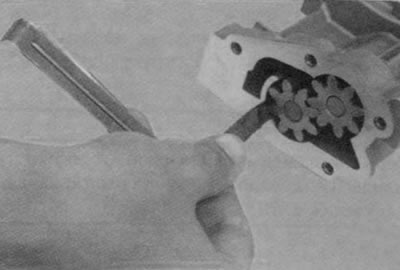
8. ...and the plunger of the pressure reducing valve.
8. ...and the plunger of the pressure reducing valve.


9. Measure the radial clearance between the gears and the pump body. It should be 0.110-0.249 mm.
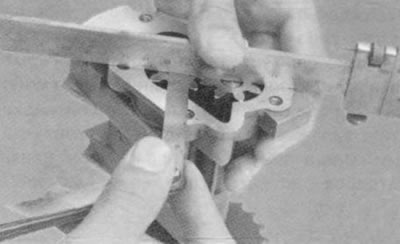


9. Measure the radial clearance between the gears and the pump body. It should be 0.110-0.249 mm.


10. Measure the axial clearance of the gears. It should be 0.020-0.086 mm. If the measured clearances do not correspond to the permissible values, replace the housing or the pump assembly.

11. Wash the pump body and dismantled parts from dirt and deposits. Remove dense varnish deposits from the internal cavities of the pump, having softened them with a solvent beforehand.

Helpful advice: Varnish oil deposits are easily removed with commercially available engine flushing products (so-called "five-minute" products).


12. Inspect the pump body and cover. If there are cracks, scratches, casting defects, damaged threaded holes, replace the body (because it is not repairable) or the pump assembly.

13. Check the relief valve plunger for scratches and signs of seizure. Small dents and burrs can be removed with a fine-grained sanding stone.

14. Check the pressure reducing valve spring for residual deformation and bending. Replace the damaged spring.

15. Check the gears for metal chipping, scoring and tooth wear. Replace damaged gears or gears with noticeable increased one-sided tooth wear.

16. Assemble the pump in the reverse order of disassembly.
This article is available on: russian, bulgarian, belarusian, ukrainian, serbian, croatian, romanian, polish, slovak, hungarian
Article has been reviewed by editor: Podkrepilov Maxim
Share with friends:
Previous
Sandero 1: Lubrication system
 

Removal and installation the oil pump
Replacing the chain and gear of the oil pump drive
Changing engine oil and oil filter
Lubrication system — design features
 
Other articles on other Renault models

➽ Oil pump repair Renault Logan 1 (2004-2012, petrol)
➽ Engine oil pump repair Renault Symbol 2 (2008-2013, petrol)
➽ Oil pump repair Renault Espace III (1996-2002)
➽ Oil pump — removal and installation Renault Duster 1 (2009-2017)
➽ Removal the water pump inlet pipe Renault Fluence 1 (2009-2020, petrol)
Link to this article in different formats
Reviews and comments of visitors
No comments yet


Add two numbers 50 + 44


Sandero 1 (2007-2012, petrol) 
  • General information
  • Structure of car
  • User manual
  • Troubleshooting
  • Maintenance
  • Practical advice
  • Power unit
  • Engine repair
  • Lubrication system
  • Cooling system
  • Fuel and exhaust system
  • Transmission
  • Clutch
  • Manual gearbox
  • Automatic gearbox
  • Drive shafts
  • Chassis, running gear
  • Front suspension
  • Rear suspension
  • Steering
  • Brake system
  • Wheels and tires
  • Body and interior
  • Exterior (external elements)
  • Interior (internal elements)
  • Doors, locks and windows
  • Car body care
  • Heater and air conditioner
  • Security system
  • Electrical equipment
  • Equipment and devices
  • Headlights and lighting
  • Power devices
  • Ignition system
  • Electrical diagrams
RenaultBook.ru © 2018–2026 | Mobile version | News and articles | Sitemap: EN BG BY UA RS HR RO PL SK HU | Administration | Site search | Bookmark
Duster 1 (2009-2017) | Fluence 1 (2009-2020, petrol) | Kangoo 1 (1997-2007) | Laguna 2 (2001-2007) | Logan 1 (2004-2012, petrol) | Logan 2 (2012-2020) | Megane 1 (1995-2002) | Megan 2 (2002-2009, petrol) | Sandero 1 (2007-2012, petrol) | Scenic 1 (1996-2003) | Symbol 1 (1999-2008, petrol) | Symbol 2 (2008-2013, petrol) | Renault 19 (1988-1996) | Espace I and II (1984-1996) | Espace III (1996-2002) | Clio 1 (1990-1998) |
We want your visit to be comfortable 😌 and use cookies 🍪 to do so.