
English Русский
Български
Беларускі
Український
Српски
Hrvatski
Română
Polski
Slovenský
Magyar
Bookmark Contacts Articles Sitemap
Company vehicles Peugeot Company vehicles Opel Company vehicles Skoda Company vehicles Land Rover Company vehicles Mitsubishi Company vehicles Volkswagen Company vehicles Honda
RenaultBook.ru


Duster   Fluence   Kangoo   Laguna   Logan   Megane   Sandero   Scenic   Symbol   Clio   Other
Sandero 1 (2007-2012, petrol)

Replacing the exhaust manifold gasket (Renault Sandero 1)

  • Main
  • Sandero
  • Sandero 1 (2007-2012, petrol)
  • Power unit
  • Engine repair
  • Replacing the exhaust manifold gasket
0
Replacing the exhaust manifold gasket


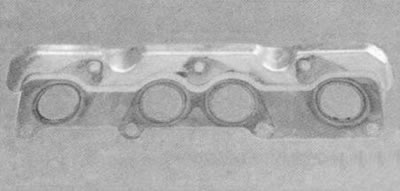
A sealing gasket made of a thin molded metal strip is installed between the flanges of the cylinder head and the exhaust manifold.

If the seal of this gasket is broken, the exhaust gases break through to the outside, accompanied by a characteristic sharp sound (the manifold "cuts"). If the malfunction cannot be eliminated by tightening the exhaust manifold mount, replace the gasket.

You will need: a socket head, a 10 mm wrench.
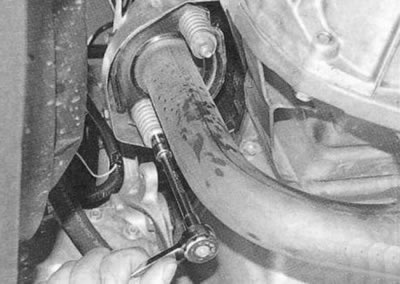
You will need: a socket head, a 10 mm wrench.


1. Disconnect the inlet pipe from the exhaust manifold (see "Replacement of exhaust system components").

Note. The replacement of the exhaust manifold gasket is shown using the K7J and K7M engines as an example. The exhaust manifold gasket of the K4M engine is replaced in a similar manner.
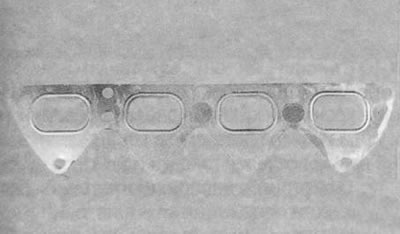


Note. The replacement of the exhaust manifold gasket is shown using the K7J and K7M engines as an…


The only difference is in the shape of the gasket.

With certain skills of the performer, when replacing the exhaust manifold gasket, it is possible not to completely disconnect the inlet pipe from the manifold. It is enough to unscrew the nuts of the pipe flange to the end of the studs, without removing the nuts completely. In this case, the exhaust manifold can be removed from the cylinder head studs and moved away from it to the distance necessary to remove the gasket.
With certain skills of the performer, when replacing the exhaust manifold gasket, it is possible…


2. Unscrew the three nuts securing the heat shield...
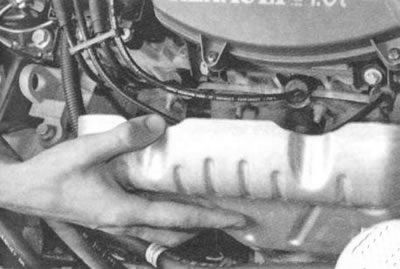
2. Unscrew the three nuts securing the heat shield...


3. ...and remove the screen.
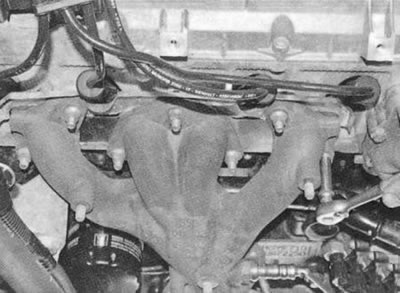


3. ...and remove the screen.


(Original of this article on the website: «Renaultbook.ru»)

4. Unscrew the seven exhaust manifold mounting nuts...
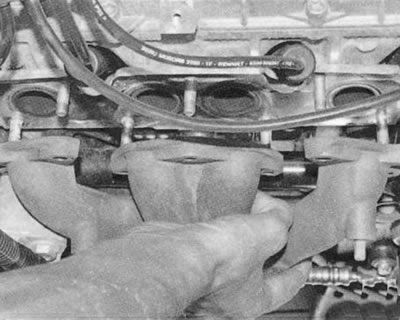
4. Unscrew the seven exhaust manifold mounting nuts...


5. ... remove it from the cylinder head studs...
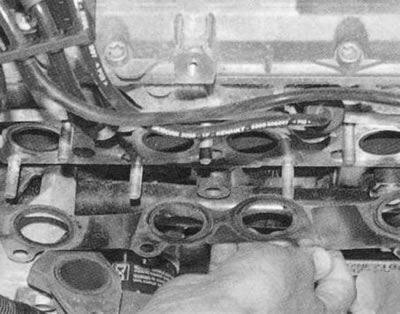
5. ... remove it from the cylinder head studs...


6. ...and the gasket installed underneath it.

7. Thoroughly clean the additional surfaces of the cylinder head and exhaust manifold from carbon deposits.


8. Install the new gasket and all removed parts in the reverse order of removal.

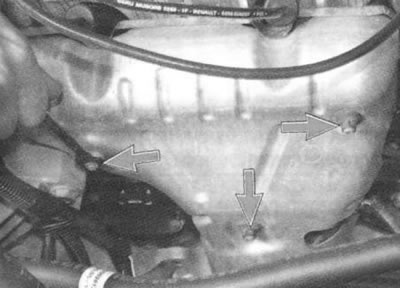
9. Tighten the exhaust manifold mounting nuts in the order shown in the photo to a torque of 21 N·m (2.1 kgf·m).
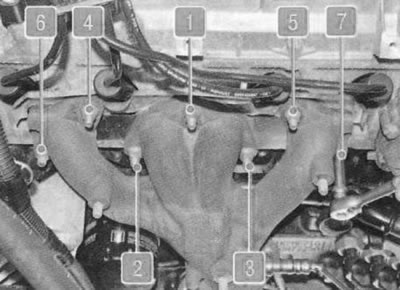
9. Tighten the exhaust manifold mounting nuts in the order shown in the photo to a torque of 21 N·m…
This article is available on: russian, bulgarian, belarusian, ukrainian, serbian, croatian, romanian, polish, slovak, hungarian
Article has been reviewed by editor: Podkrepilov Maxim
Share with friends:
Previous
Sandero 1: Engine repair
Next

Replacing the intake manifold seal
Replacing the oil level indicator guide seal
Replacing the oil pan gasket
Replacing crankshaft seals
Replacing the camshaft seal
Replacing the camshaft
Disassembly, repair and assembly of the cylinder head
Lapping valves
Removal and installation the engine
Other articles on other Renault models

➽ Replacing the exhaust manifold gasket Renault Logan 1 (2004-2012, petrol)
➽ Exhaust manifold Renault Duster 1 (2009-2017)
➽ Exhaust manifold (engine K4M) Renault Fluence 1 (2009-2020, petrol)
➽ Exhaust manifold Renault Kangoo 1 (1997-2007)
➽ Removal and installation the rear exhaust manifold (LX7 engines) Renault Laguna 2 (2001-2007)
Link to this article in different formats
Reviews and comments of visitors
No comments yet


Add two numbers 24 + 37


Sandero 1 (2007-2012, petrol) 
  • General information
  • Structure of car
  • User manual
  • Troubleshooting
  • Maintenance
  • Practical advice
  • Power unit
  • Engine repair
  • Lubrication system
  • Cooling system
  • Fuel and exhaust system
  • Transmission
  • Clutch
  • Manual gearbox
  • Automatic gearbox
  • Drive shafts
  • Chassis, running gear
  • Front suspension
  • Rear suspension
  • Steering
  • Brake system
  • Wheels and tires
  • Body and interior
  • Exterior (external elements)
  • Interior (internal elements)
  • Doors, locks and windows
  • Car body care
  • Heater and air conditioner
  • Security system
  • Electrical equipment
  • Equipment and devices
  • Headlights and lighting
  • Power devices
  • Ignition system
  • Electrical diagrams
RenaultBook.ru © 2018–2026 | Mobile version | News and articles | Sitemap: EN BG BY UA RS HR RO PL SK HU | Administration | Site search | Bookmark
Duster 1 (2009-2017) | Fluence 1 (2009-2020, petrol) | Kangoo 1 (1997-2007) | Laguna 2 (2001-2007) | Logan 1 (2004-2012, petrol) | Logan 2 (2012-2020) | Megane 1 (1995-2002) | Megan 2 (2002-2009, petrol) | Sandero 1 (2007-2012, petrol) | Scenic 1 (1996-2003) | Symbol 1 (1999-2008, petrol) | Symbol 2 (2008-2013, petrol) | Renault 19 (1988-1996) | Espace I and II (1984-1996) | Espace III (1996-2002) | Clio 1 (1990-1998) |
We want your visit to be comfortable 😌 and use cookies 🍪 to do so.