
English Русский
Български
Беларускі
Український
Српски
Hrvatski
Română
Polski
Slovenský
Magyar
Bookmark Contacts Articles Sitemap
Company vehicles Peugeot Company vehicles Opel Company vehicles Skoda Company vehicles Land Rover Company vehicles Mitsubishi Company vehicles Volkswagen Company vehicles Honda
RenaultBook.ru


Duster   Fluence   Kangoo   Laguna   Logan   Megane   Sandero   Scenic   Symbol   Clio   Other
Sandero 1 (2007-2012, petrol)

Lapping valves (Renault Sandero 1)

  • Main
  • Sandero
  • Sandero 1 (2007-2012, petrol)
  • Power unit
  • Engine repair
  • Lapping valves
0
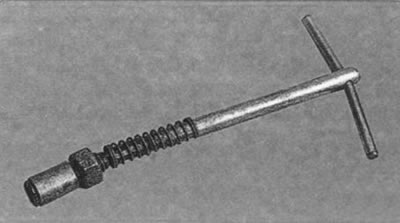
The valve grinding is performed on the removed cylinder head. To remove the valves from the cylinder head guide bushings, it is necessary to remove the valve springs by compressing them with a special device and removing the crackers from the spring plates (see "Replacing valve stem seals"). For grinding valves, it is most convenient to use a special mechanical device (reversible drill)

The valve grinding is performed on the removed cylinder head. To remove the valves from the…


In addition, ready-made manual valve holders are available for sale

If there are no ready-made devices, you can use a device made according to the drawing (see fig. 5.14).

Note: For the K4M engine, the diameter of the metal rod 1 (Fig. 5.14) is 6 mm.


Instead of a rubber hose and clamps, you can weld a tip to the rod of the device, in the side wall of which a through threaded hole is made, into which a bolt is screwed to fix the valve rod.

In addition, you will need: lapping paste, kerosene, a weak spring, the outer diameter of which passes into the valve seat hole.

1. Clean the valve from carbon deposits.
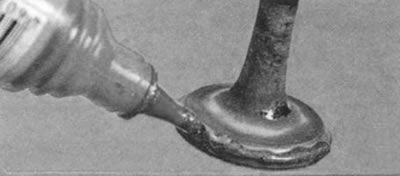
1. Clean the valve from carbon deposits.


2. Apply a continuous thin layer of lapping paste to the valve chamfer.
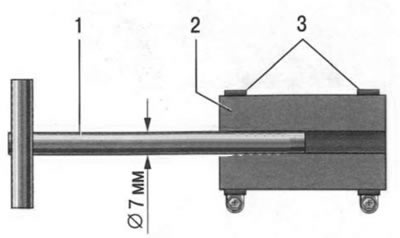


Fig. 5.14. Valve grinding device: 1 - metal rod; 2 - rubber hose; 3 - screw clamps.

Fig. 5.14. Valve grinding device: 1 - metal rod; 2 - rubber hose; 3 - screw clamps.


3. Place the pre-selected spring on the valve stem and insert the valve into the guide bushing from the combustion chamber side, lubricating the valve stem with a layer of graphite grease.

Note: Graphite grease prevents the abrasive from the lapping paste from getting into the guide bushing holes and makes it easier to rotate the valve during lapping.


4. Place the valve lapping tool on the valve stem (or with some tension a rubber tube to connect the valve to the reversible drill).

5. Turn on the drill at minimum speed (in reverse mode) or by rotating the device (in case of manual lapping) alternately in both directions by half a turn, grind the valve, periodically pressing it to the seat, then weakening the pressing force.
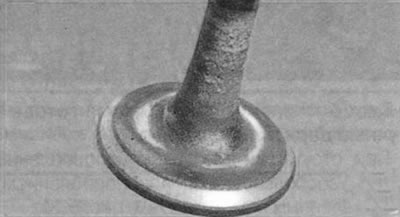
5. Turn on the drill at minimum speed (in reverse mode) or by rotating the device (in case of…


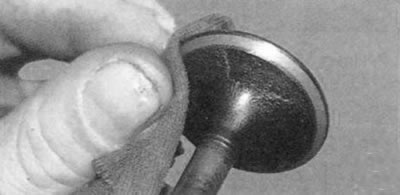
6. Grind the valve until a matte-gray continuous single-color belt at least 1.5 mm wide appears on its chamfer, while...


6. Grind the valve until a matte-gray continuous single-color belt at least 1.5 mm wide appears on…


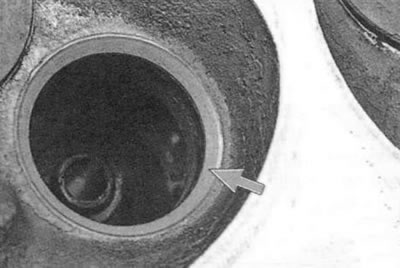
7. ...after grinding, a shiny belt at least 1.5 mm wide should also appear on the valve seat.
7. ...after grinding, a shiny belt at least 1.5 mm wide should also appear on the valve seat.


8. After grinding, carefully wipe the valve and seat with a clean cloth and rinse to remove any remaining grinding paste. Check the valve for leaks by installing it in the head with springs and crackers. Then lay the head on its side and pour kerosene into the channel that is closed by the valve. If kerosene does not leak into the combustion chamber within 3 minutes, the valve is sealed.
This article is available on: russian, bulgarian, belarusian, ukrainian, serbian, croatian, romanian, polish, slovak, hungarian
Article has been reviewed by editor: Podkrepilov Maxim
Share with friends:
Previous
Sandero 1: Engine repair
Next

Disassembly, repair and assembly of the cylinder head
Replacing the camshaft
Replacing the exhaust manifold gasket
Replacing the intake manifold seal
Replacing the oil level indicator guide seal
Removal and installation the engine
Other articles on other Renault models

➽ Lapping valves Renault Logan 1 (2004-2012, petrol)
➽ Checking the valves of the K4M engine Renault Fluence 1 (2009-2020, petrol)
➽ Electromagnetic valves of hydraulic distributor Renault Laguna 2 (2001-2007)
➽ Cleaning, inspection and maintenance of the cylinder head and… Renault Megane 1 (1995-2002)
➽ Valves — removal and installation Renault Scenic 1 (1996-2003)
Link to this article in different formats
Reviews and comments of visitors
No comments yet


Add two numbers 28 + 45


Sandero 1 (2007-2012, petrol) 
  • General information
  • Structure of car
  • User manual
  • Troubleshooting
  • Maintenance
  • Practical advice
  • Power unit
  • Engine repair
  • Lubrication system
  • Cooling system
  • Fuel and exhaust system
  • Transmission
  • Clutch
  • Manual gearbox
  • Automatic gearbox
  • Drive shafts
  • Chassis, running gear
  • Front suspension
  • Rear suspension
  • Steering
  • Brake system
  • Wheels and tires
  • Body and interior
  • Exterior (external elements)
  • Interior (internal elements)
  • Doors, locks and windows
  • Car body care
  • Heater and air conditioner
  • Security system
  • Electrical equipment
  • Equipment and devices
  • Headlights and lighting
  • Power devices
  • Ignition system
  • Electrical diagrams
RenaultBook.ru © 2018–2026 | Mobile version | News and articles | Sitemap: EN BG BY UA RS HR RO PL SK HU | Administration | Site search | Bookmark
Duster 1 (2009-2017) | Fluence 1 (2009-2020, petrol) | Kangoo 1 (1997-2007) | Laguna 2 (2001-2007) | Logan 1 (2004-2012, petrol) | Logan 2 (2012-2020) | Megane 1 (1995-2002) | Megan 2 (2002-2009, petrol) | Sandero 1 (2007-2012, petrol) | Scenic 1 (1996-2003) | Symbol 1 (1999-2008, petrol) | Symbol 2 (2008-2013, petrol) | Renault 19 (1988-1996) | Espace I and II (1984-1996) | Espace III (1996-2002) | Clio 1 (1990-1998) |
We want your visit to be comfortable 😌 and use cookies 🍪 to do so.