



Contents: Removal 🠛 Installation 🠛
Removal
1. Block the rear wheels, apply the handbrake, jack up the front of the car and place it on axle stands. Remove the front wheel.
2. Disconnect the end of the anti-roll bar from the lower arm (see Chapter 6).
3. Loosen the nut securing the tensioner (where available) to the lower control arm, then loosen both lower control arm pivot bolts.
4. Remove the nut and pinch bolt securing the lower arm to the steering knuckle. Carefully pry the ball joint away from the steering knuckle, being careful not to damage the drive shaft boots or the ball joint itself. Remove the plastic protective plate installed on the hinge rod.
5. Remove the nuts and bolts securing the ball joint to the lower arm (see illustration).
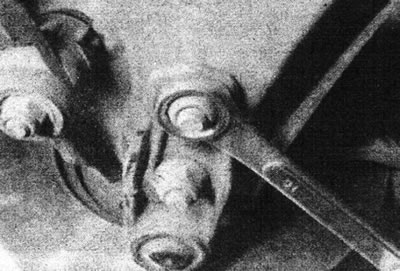
8.5. Lower arm ball joint fastening nuts.
Remove the ball joint.
6. Make sure the ball joint moves freely and smoothly. Inspect the hinge boot for damage such as cracks. If any are found, replace the ball joint assembly - the boot cannot be replaced separately.
Installation
7. Install the ball joint onto the lower arm. Insert the bolts and washers and tighten the mounting nuts to the torque specified in the Specifications.
8. Install the plastic plate onto the ball joint rod, then insert the rod into the steering knuckle. Install the hinge clamp bolt and tighten its nut to the specified tightening torque Specifications.
9. Connect the end of the stabilizer bar to the lower arm, making sure the rubber pads are installed correctly. Do not tighten the fasteners completely yet.
10. Install the wheel, lower the vehicle to the ground and tighten the wheel bolts to the specified tightening torque Specifications.
11. Without jacking up the vehicle, rock it to adjust the position of the lower control arm components. Tighten the lower control arm pivot bolts and stabilizer bar fasteners to the specified tightening torque Specifications. Attach the lever stretcher (where available) into working position, securely clamping its nut and bolt.