
English Русский
Български
Беларускі
Український
Српски
Hrvatski
Română
Polski
Slovenský
Magyar
Bookmark Contacts Articles Sitemap
Company vehicles Peugeot Company vehicles Opel Company vehicles Skoda Company vehicles Land Rover Company vehicles Mitsubishi Company vehicles Volkswagen Company vehicles Honda
RenaultBook.ru


Duster   Fluence   Kangoo   Laguna   Logan   Megane   Sandero   Scenic   Symbol   Clio   Other
Sandero 1 (2007-2012, petrol)

Replacing the bearing and clutch release fork (Renault Sandero 1)

  • Main
  • Sandero
  • Sandero 1 (2007-2012, petrol)
  • Transmission
  • Clutch
  • Replacing the bearing and clutch release fork
0
A sign that the clutch release bearing needs to be replaced is increased noise when the clutch pedal is pressed.

Note: When replacing the clutch release bearing due to noise, check the condition of the drive disc pressure spring petals. If the ends of the petals are heavily worn where they contact the bearing, replace the drive disc assembly.

Note: When replacing the clutch release bearing due to noise, check the condition of the drive disc…


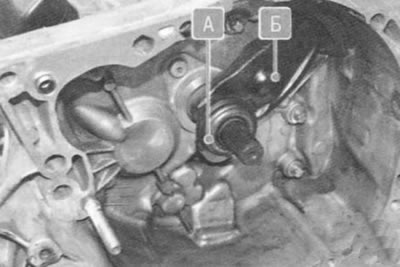
Clutch release bearing A assembled with the coupling is mounted on the guide sleeve and connected to clutch release fork B. The fork is inserted with its journals into the blind grooves of the bearing coupling until it stops and rests on the ball joint screwed into the clutch housing. The fork is fixed in a certain position by its corrugated rubber cover inserted into the clutch housing window.

1. Remove the gearbox (see "Removal and installation of a manual gearbox").
1. Remove the gearbox (see «Removal and installation of a manual gearbox»).


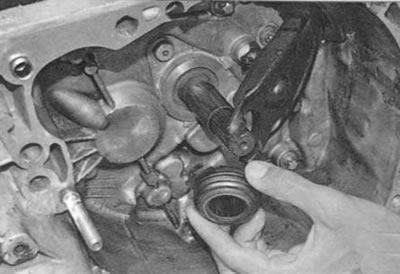
2. By moving the clutch release bearing forward along the guide sleeve, remove the fork from the grooves of its coupling and remove the bearing.


2. By moving the clutch release bearing forward along the guide sleeve, remove the fork from the…


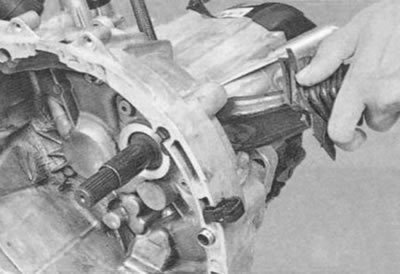
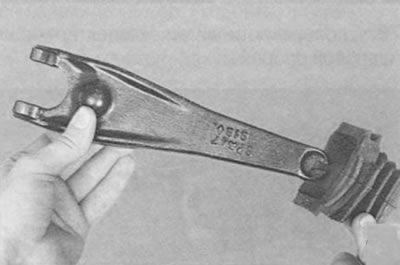
3. If it is necessary to replace the clutch release fork, remove its mudguard from the opening in the clutch housing and remove the clutch release fork from the ball joint.
3. If it is necessary to replace the clutch release fork, remove its mudguard from the opening in…


4. If necessary, remove the mudguard from the fork.
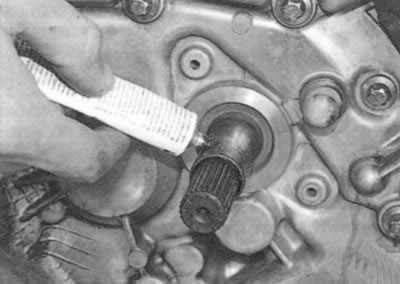
4. If necessary, remove the mudguard from the fork.


5. Apply a thin layer of high-temperature grease to the outer surface of the guide bushing...
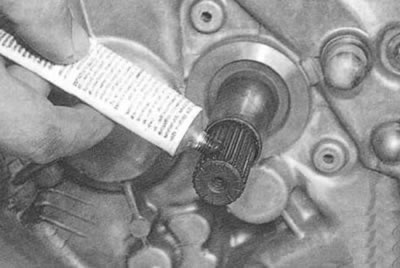


5. Apply a thin layer of high-temperature grease to the outer surface of the guide bushing...


6. ...splines of the primary shaft of the gearbox...
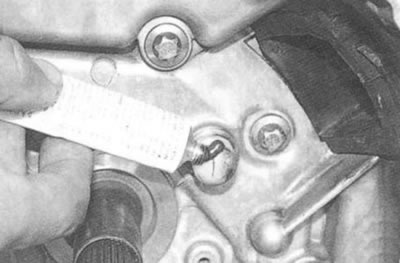
6. ...splines of the primary shaft of the gearbox...


7. ...the ball joint of the clutch release fork...
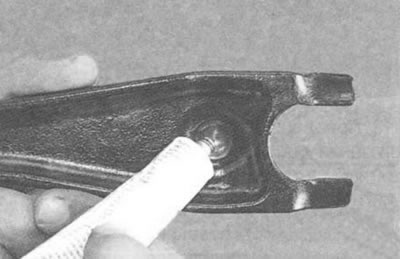
7. ...the ball joint of the clutch release fork...


8. ...fork surfaces in contact with the ball joint...
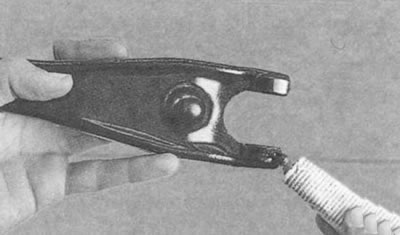
8. ...fork surfaces in contact with the ball joint...


9. ...and with the clutch release bearing sleeve.


10. Install the clutch release fork and new bearing assembly with the clutch (making sure that it rotates smoothly and quietly and that there is no play) in the reverse order of removal.

Warning. There is no additional fixation of the release fork on the bearing sleeve and ball joint. Therefore, after installing the fork and bearing (and even more so after installing the gearbox) do not rotate the fork in a vertical plane, as it may disengage from the coupling grooves.
This article is available on: russian, bulgarian, belarusian, ukrainian, serbian, croatian, romanian, polish, slovak, hungarian
Article has been reviewed by editor: Podkrepilov Maxim
Share with friends:
Previous
Sandero 1: Clutch
Next

Removal and installation the clutch
Clutch — design features
Replacing and adjusting the clutch release cable
Pedal assembly repair
Other articles on other Renault models

➽ Replacing the bearing and clutch release fork Renault Logan 1 (2004-2012, petrol)
➽ Bearing and clutch release fork Renault Espace III (1996-2002)
➽ Clutch release bearing Renault Duster 1 (2009-2017)
➽ Replacing the bearing on the clutch housing side Renault Fluence 1 (2009-2020, petrol)
➽ Replacing the bearing on the clutch housing side Renault Megan 2 (2002-2009, petrol)
Link to this article in different formats
Reviews and comments of visitors
No comments yet


Add two numbers 23 + 14


Sandero 1 (2007-2012, petrol) 
  • General information
  • Structure of car
  • User manual
  • Troubleshooting
  • Maintenance
  • Practical advice
  • Power unit
  • Engine repair
  • Lubrication system
  • Cooling system
  • Fuel and exhaust system
  • Transmission
  • Clutch
  • Manual gearbox
  • Automatic gearbox
  • Drive shafts
  • Chassis, running gear
  • Front suspension
  • Rear suspension
  • Steering
  • Brake system
  • Wheels and tires
  • Body and interior
  • Exterior (external elements)
  • Interior (internal elements)
  • Doors, locks and windows
  • Car body care
  • Heater and air conditioner
  • Security system
  • Electrical equipment
  • Equipment and devices
  • Headlights and lighting
  • Power devices
  • Ignition system
  • Electrical diagrams
RenaultBook.ru © 2018–2026 | Mobile version | News and articles | Sitemap: EN BG BY UA RS HR RO PL SK HU | Administration | Site search | Bookmark
Duster 1 (2009-2017) | Fluence 1 (2009-2020, petrol) | Kangoo 1 (1997-2007) | Laguna 2 (2001-2007) | Logan 1 (2004-2012, petrol) | Logan 2 (2012-2020) | Megane 1 (1995-2002) | Megan 2 (2002-2009, petrol) | Sandero 1 (2007-2012, petrol) | Scenic 1 (1996-2003) | Symbol 1 (1999-2008, petrol) | Symbol 2 (2008-2013, petrol) | Renault 19 (1988-1996) | Espace I and II (1984-1996) | Espace III (1996-2002) | Clio 1 (1990-1998) |
We want your visit to be comfortable 😌 and use cookies 🍪 to do so.