



Remove the cover under the interior rearview mirror.
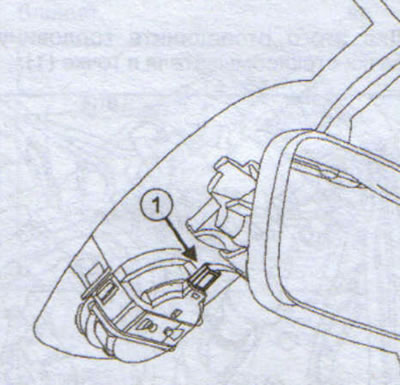
Disconnect the rain and light sensor connector (1).
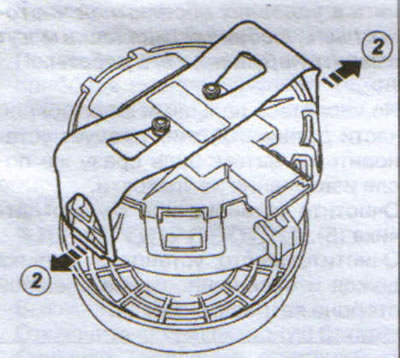
Disconnect the two side clips (2) of the rain and light sensor using the trim removal lever tool (Car. 1363).
Remove the rain and light sensor.
Note: After removing the rain and light sensor, do not use the old adhesive base.
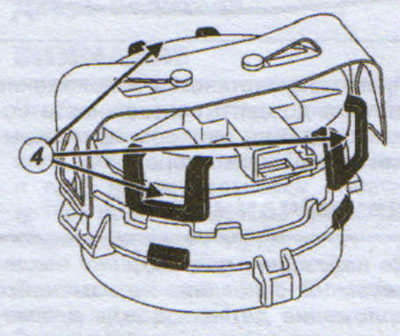
Remove the rain and light sensor circuit board assembly by pressing on the latches (4) with a small flat-blade screwdriver.
Remove the rain and light sensor printed circuit board assembly.
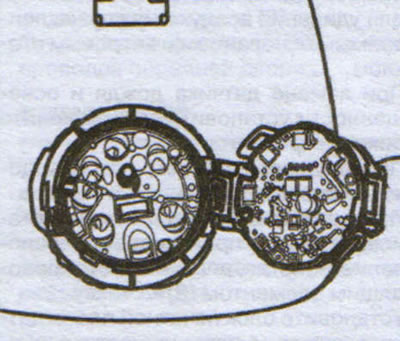
Attention. Removal and installation of the rain and light sensor must be performed in conditions of absolute cleanliness: dust, any particle of fabric can cause a malfunction.
Do not touch the electronic part of the sensor with your fingers. The sensor should be installed on the vehicle immediately after removing it from the packaging.
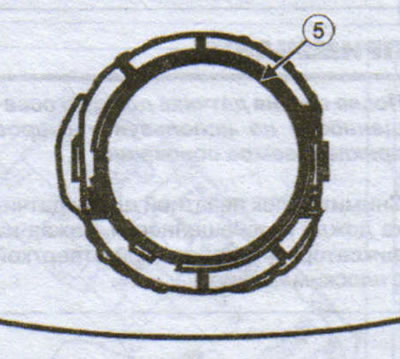
Clean the sensor mounting ring (5).
Clean the rain and light sensor installation area on the outside of the windshield.
The correct installation and position of the rain and light sensor is indicated by a clicking sound when the side latches close.
Note: To avoid damaging the adhesive base, do not change the position of the rain and light sensor after it has been installed on the windshield.
Wait 5 minutes before connecting the rain and light sensor to remove air between the adhesive base and the windshield.
When replacing the rain and light sensor, install it and close the side clips.
Connect the rain and light sensor connector.
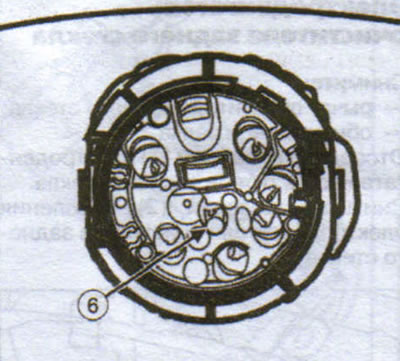
When replacing the windshield, install the new adhesive base with the sensitive light-conducting element (6) to the glass.
Install the rain and light sensor circuit board assembly with the connector facing up.
Secure the rain and light sensor circuit board assembly to the new adhesive base using clips.
Secure the rain and light sensor to the windshield mounting base using the side clips.
Wait 5 minutes before connecting the rain and light sensor.
Connect the rain and light sensor connector.
Snap the housing parts under the rear view mirror.
Initialize the new sensor with the diagnostic tool following the instructions in the "Operations to be performed after repair" menu.