



Assembling the hood lock
Removal
1. Open the hood.
2. Mark the position of the lock on the partition to facilitate adjustment of the position during installation.
3. Remove the two mounting bolts and washers, then lift the lock assembly off the bulkhead (see illustration).
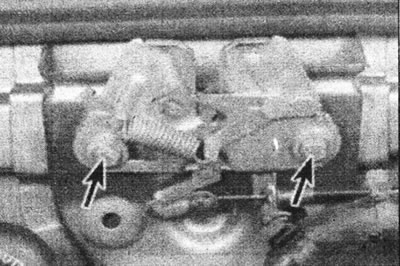
10.3. Hood lock assembly mounting bolts (marked with arrows).
4. Remove the mounting bracket and release the cable housing from the lock.
5. Disconnect the end of the hood lock cable from the lock operating lever, then remove the lock assembly.
Installation
6. Install in reverse order, aligning the assembly with the marks made on the partition before removal.
7. If necessary, adjust the position of the rear of the hood relative to the adjacent body panels by changing the position of the lock assembly.
(Original article is on the portal: www.RENAULTBOOK.ru)
Hood lock pin
8. The locking pin is welded to the hood and cannot be removed or moved to adjust the position.
Assembling the hood release lever/cable
Removal
9. Remove the lower portion of the instrument panel on the driver's side. Please note that there is no need to remove the headlight aiming switch from the panel (where available) and the air damper control assembly.
10. Working in the engine compartment, remove the mounting bracket and release the cable housing from the lock.
11. Disconnect the end of the cable from the operating lever of the lock.
12. While working inside the vehicle, carefully pass the cable from the engine compartment through the bulkhead sealing ring. Remember the location of the cable.
Installation
13. Install in reverse order. Make sure the o-ring is securely seated in the bulkhead and route the cable as noted during removal.