
English Русский
Български
Беларускі
Український
Српски
Hrvatski
Română
Polski
Slovenský
Magyar
Bookmark Contacts Articles Sitemap
Company vehicles Peugeot Company vehicles Opel Company vehicles Skoda Company vehicles Land Rover Company vehicles Mitsubishi Company vehicles Volkswagen Company vehicles Honda
RenaultBook.ru


Duster   Fluence   Kangoo   Laguna   Logan   Megane   Sandero   Scenic   Symbol   Clio   Other
Clio 1 (1990-1998)

Clutch pedal — removal and installation (Renault Clio 1)

  • Main
  • Clio
  • Clio 1 (1990-1998)
  • Transmission
  • Clutch
  • Clutch pedal — removal and installation
0
Contents: Removal 🠛 Installation 🠛

Removal


1. Disconnect the negative cable from the battery.

2. Unfasten the cable (see previous chapter), but do not pull it out of the partition.

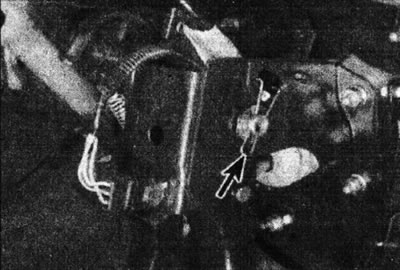
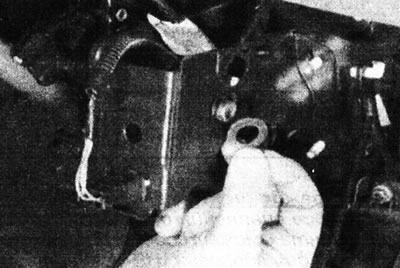
3. Remove the mounting brackets from both ends of the brake/clutch pedal pivot shaft and remove the washers. Please note that the ends of the brackets are inserted into the pedal bracket (see illustrations).
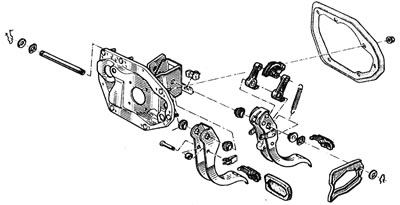
3.3a. Pedal components and bracket.
3.3a. Pedal components and bracket.


3.3b. Remove the pedal pivot axle mounting bracket (marked with an arrow)...
3.3b. Remove the pedal pivot axle mounting bracket (marked with an arrow)...


3.3s.... and the puck.

3.3s.... and the puck.


4. Loosen the mounting nuts and remove the left pivot axle bracket from the left side of the clutch pedal. Remove the spring washer (see illustration).
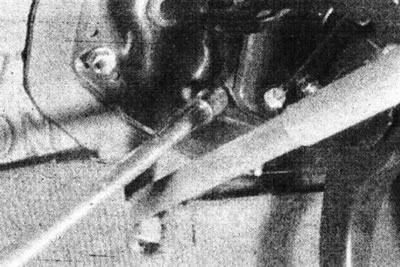
3.4. Remove the left pedal pivot bracket.

3.4. Remove the left pedal pivot bracket.


5. Partially remove the pivot axle by moving it to the right and remove the pedal together with the automatic adjuster and bushings (see illustration).
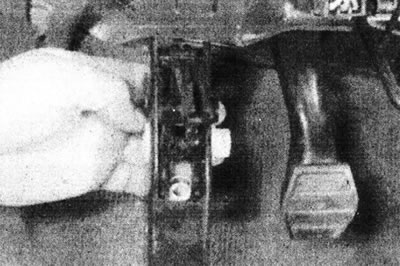
3.5. Remove the clutch pedal.

3.5. Remove the clutch pedal.


Note that the thicker bushing is on the right side.

6. Unhook and remove the return spring from the regulator toothed segment. Remember the correct location of the regulator components.

7. Remove the bushings and take out the regulator support levers and the toothed segment (see illustration).
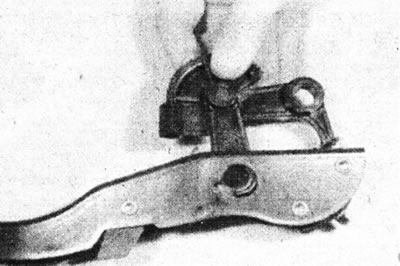
3.7. Remove the automatic regulator from the pedal.

3.7. Remove the automatic regulator from the pedal.


Inspect these components and replace them if they are worn.

Installation


8. Apply a small amount of general purpose grease to the bushings and working surfaces of the support arms, toothed segment and pedal pivot axle.

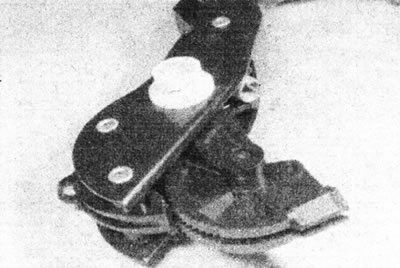
9. Install the plastic bushings into the clutch pedal (a larger bushing closer to the brake pedal), so that their protrusions fit into the slots of the pedal (see illustrations).

You can find the original at this link www.RenaultBook.ru
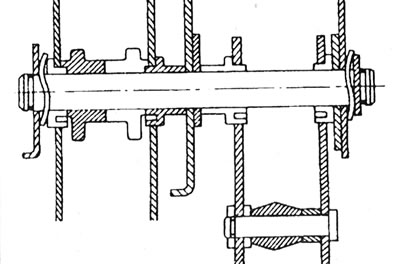
3.9a. Pedal bushings in section.
3.9a. Pedal bushings in section.


3.9b. Plastic bushings and automatic regulator in working position.

3.9b. Plastic bushings and automatic regulator in working position.


Hook the return spring of the regulator toothed segment.

10. To facilitate the installation procedure and avoid losing parts, it is recommended to assemble the pedal on the auxiliary shaft. If you don't have a suitable shaft handy, you'll need to clamp the bushings together until the brackets are installed.


11. Install the pedal assembly into the bracket and push the pivot axle into it from the right side (see illustration).
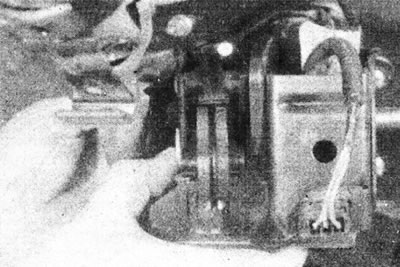
3.11. Install the pedal assembly into the bracket.

3.11. Install the pedal assembly into the bracket.


Install the right spring clip and washer so that the clip fits into the bracket opening.

12. Install the spring washer and support the bracket at the left end of the shaft. Screw the bracket mounting nuts on by hand.

13. Using a clamp or similar tool, press the sides of the bracket together and install the mounting bracket into the groove, making sure that the ends of the bracket fit into the opening in the bracket. The ends of the bracket can be shortened by 2.0 mm if necessary to facilitate installation, but make sure this has not already been done (see illustration).
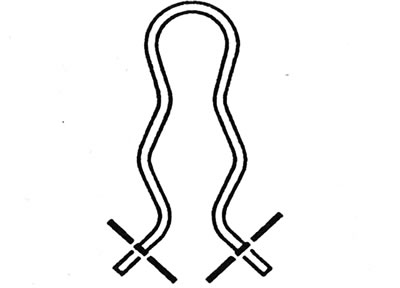
3.13. The ends of the mounting bracket can be cut as shown to facilitate installation.

3.13. The ends of the mounting bracket can be cut as shown to facilitate installation.


14. Remove the clamp and fully tighten the bracket mounting nuts. Please note that the bracket has a locking slot to prevent the shaft from rotating.

15. Hook the cable and check the operation of the automatic regulator as described in Chapter 2.
This article is available on: russian, bulgarian, belarusian, ukrainian, serbian, croatian, romanian, polish, slovak, hungarian
Article has been reviewed by editor: Fedoseev Denis
Share with friends:
Previous
Clio 1: Clutch
Next

Clutch cable — removal and installation
General description of the clutch
Clutch specifications
Clutch assembly — removal, inspection and installation
Release bearing — removal, inspection and installation
Other articles on other Renault models

➽ Clutch pedal — removal and installation Renault Duster 1 (2009-2017)
➽ Clutch pedal and clutch pedal travel sensors Renault Fluence 1 (2009-2020, petrol)
➽ Adjusting the free travel of the clutch pedal Renault Laguna 2 (2001-2007)
➽ Clutch pedal Renault Logan 2 (2012-2020)
➽ Checking the stroke, removing and installing the clutch pedal Renault Megane 1 (1995-2002)
Link to this article in different formats
Reviews and comments of visitors
No comments yet


Add two numbers 16 + 30


Clio 1 (1990-1998) 
  • General information
  • Maintenance
  • Troubleshooting
  • Power unit
  • Petrol engines 1.1 l (C)
  • Petrol engines 1.2 l (D)
  • Petrol engines 1.2/1.4 l (E)
  • Petrol engines 1.8 l (F)
  • Diesel engines
  • Overhaul of engines
  • Cooling and heating
  • Fuel system (carburetor)
  • Central fuel injection
  • Distributed fuel injection
  • Fuel system (diesel)
  • Starting and charging system
  • Ignition system (transistor)
  • Ignition system (electronic)
  • Pre-heating of diesel engines
  • Transmission
  • Clutch
  • Manual gearbox
  • Automatic gearbox
  • Drive shafts
  • Chassis, running gear
  • Brake system
  • Car suspension
  • Steering system
  • Body and interior
  • Exterior (external elements)
  • Doors, locks and windows
  • Electrical equipment
  • Equipment and devices
  • Electrical circuits
RenaultBook.ru © 2018–2026 | Mobile version | News and articles | Sitemap: EN BG BY UA RS HR RO PL SK HU | Administration | Site search | Bookmark
Duster 1 (2009-2017) | Fluence 1 (2009-2020, petrol) | Kangoo 1 (1997-2007) | Laguna 2 (2001-2007) | Logan 1 (2004-2012, petrol) | Logan 2 (2012-2020) | Megane 1 (1995-2002) | Megan 2 (2002-2009, petrol) | Sandero 1 (2007-2012, petrol) | Scenic 1 (1996-2003) | Symbol 1 (1999-2008, petrol) | Symbol 2 (2008-2013, petrol) | Renault 19 (1988-1996) | Espace I and II (1984-1996) | Espace III (1996-2002) | Clio 1 (1990-1998) |
We want your visit to be comfortable 😌 and use cookies 🍪 to do so.