English Русский
Български
Беларускі
Український
Српски
Hrvatski
Română
Polski
Slovenský
Magyar
Bookmark Contacts Articles Sitemap
Company vehicles Peugeot Company vehicles Opel Company vehicles Skoda Company vehicles Land Rover Company vehicles Mitsubishi Company vehicles Volkswagen Company vehicles Honda
RenaultBook.ru


Duster   Fluence   Kangoo   Laguna   Logan   Megane   Sandero   Scenic   Symbol   Clio   Other
Sandero 1 (2007-2012, petrol)

Replacing the condenser (Renault Sandero 1)

  • Main
  • Sandero
  • Sandero 1 (2007-2012, petrol)
  • Body and interior
  • Heater and air conditioner
  • Replacing the condenser
0
You will need: pliers, a 10 mm wrench.

1. Disconnect the wire from the negative terminal of the battery.

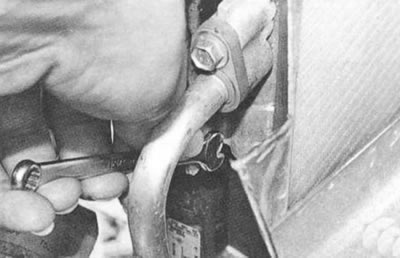
2. Remove the refrigerant from the air conditioning system (see "Removal refrigerant from the air conditioning system").
2. Remove the refrigerant from the air conditioning system (see «Removal refrigerant from the air…


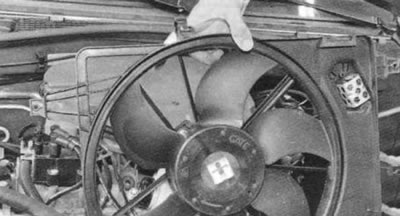
3. Remove the engine cooling system radiator fan (see "Removal and installation of the electric fan of the radiator of the engine cooling system").
3. Remove the engine cooling system radiator fan (see «Removal and installation of the electric fan…


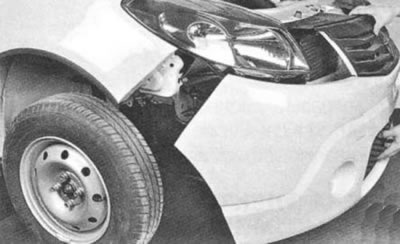
4. Remove the front bumper.

4. Remove the front bumper.


5. Turn the right...
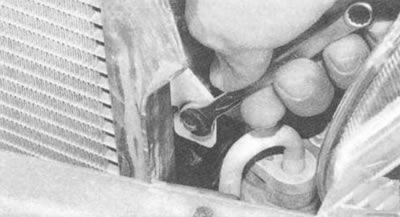


5. Turn the right...


6. ...and the left bolts securing the upper condenser brackets to the radiator frame.
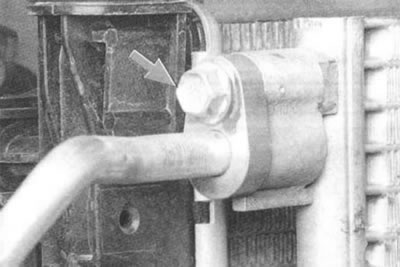
6. ...and the left bolts securing the upper condenser brackets to the radiator frame.


7. Loosen the bolt securing the high pressure supply pipe flange to the condenser flange and disconnect the pipe from the condenser.
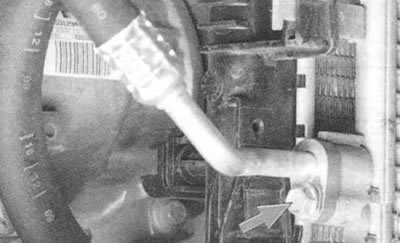
7. Loosen the bolt securing the high pressure supply pipe flange to the condenser flange and…


8. Remove the bolt securing the high pressure outlet pipe flange to the bottom of the right condenser tank.


Warnings:
  • Immediately after disconnecting, plug open ends of pipes to prevent dirt and moisture from entering the system.
  • Pay attention to the sealing rings of the flange connections of the pipelines. During the repair of the system, when disconnecting the pipelines, the sealing rings must be replaced.
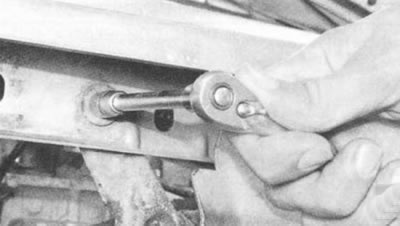

Pay attention to the sealing rings of the flange connections of the pipelines. During the repair of…


9. Unscrew two bolts securing the radiator brackets to the body...
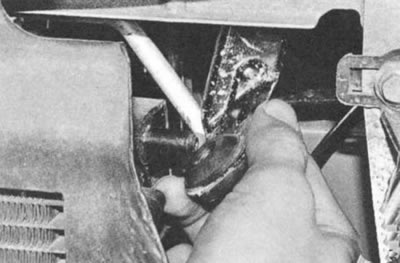
9. Unscrew two bolts securing the radiator brackets to the body...


10. ...and remove the mounting brackets.

11. Slide the radiator back as far as it will go, without applying excessive force to avoid damaging the fin plates.

12. Remove the condenser with the receiver assembly by carefully pulling it upwards.

13. Install the condenser in the reverse order of removal.

(Original publication on the portal: www.renaultbook.ru)


Note.
  • Note.
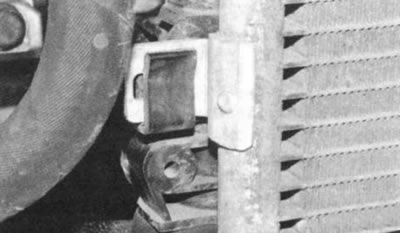
  • When installing the condenser, make sure that the lower supports on the right and left sides fit into the plastic holders on the radiator tanks.

Warnings:
  • Open the technological plugs of the flanges of the new condenser only immediately before connecting the pipelines.
  • Open the technological plugs of the flanges of the new condenser only immediately before connecting…
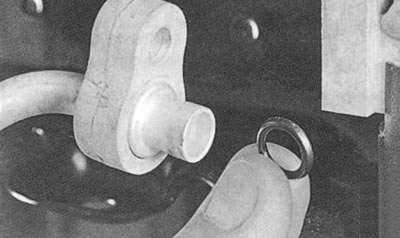
  • When installing new pipe flange O-rings, be sure to lubricate them with air conditioning compressor oil.

14. Fill the air conditioning system with refrigerant at a specialized center for servicing automotive air conditioners.
This article is available on: russian, bulgarian, belarusian, ukrainian, serbian, croatian, romanian, polish, slovak, hungarian
Article has been reviewed by editor: Podkrepilov Maxim
Share with friends:
Previous
Sandero 1: Heater and air conditioner
Next

Replacing the compressor clutch solenoid
Replacing the drive pulley bearing
Removal and installation the air conditioning compressor
Air conditioner compressor — design features
Replacing the sealing rings
Replacing the receiver filter element
Replacing the thermostat valve
Replacing the pressure sensor
Removal and installation the heater radiator
Removal and installation of the control unit of the heating, air…
Other articles on other Renault models

➽ Replacing filter elements Renault Duster 1 (2009-2017)
➽ Replacing the air filter Renault Fluence 1 (2009-2020, petrol)
➽ Replacing incandescent lamps Renault Kangoo 1 (1997-2007)
➽ Replacing the remote control battery Renault Laguna 2 (2001-2007)
➽ Replacing a punctured tire Renault Logan 1 (2004-2012, petrol)
Link to this article in different formats
Reviews and comments of visitors
No comments yet


Add two numbers 23 + 48


Sandero 1 (2007-2012, petrol) 
  • General information
  • Structure of car
  • User manual
  • Troubleshooting
  • Maintenance
  • Practical advice
  • Power unit
  • Engine repair
  • Lubrication system
  • Cooling system
  • Fuel and exhaust system
  • Transmission
  • Clutch
  • Manual gearbox
  • Automatic gearbox
  • Drive shafts
  • Chassis, running gear
  • Front suspension
  • Rear suspension
  • Steering
  • Brake system
  • Wheels and tires
  • Body and interior
  • Exterior (external elements)
  • Interior (internal elements)
  • Doors, locks and windows
  • Car body care
  • Heater and air conditioner
  • Security system
  • Electrical equipment
  • Equipment and devices
  • Headlights and lighting
  • Power devices
  • Ignition system
  • Electrical diagrams
RenaultBook.ru © 2018–2026 | Mobile version | News and articles | Sitemap: EN BG BY UA RS HR RO PL SK HU | Administration | Site search | Bookmark
Duster 1 (2009-2017) | Fluence 1 (2009-2020, petrol) | Kangoo 1 (1997-2007) | Laguna 2 (2001-2007) | Logan 1 (2004-2012, petrol) | Logan 2 (2012-2020) | Megane 1 (1995-2002) | Megan 2 (2002-2009, petrol) | Sandero 1 (2007-2012, petrol) | Scenic 1 (1996-2003) | Symbol 1 (1999-2008, petrol) | Symbol 2 (2008-2013, petrol) | Renault 19 (1988-1996) | Espace I and II (1984-1996) | Espace III (1996-2002) | Clio 1 (1990-1998) |
We want your visit to be comfortable 😌 and use cookies 🍪 to do so.