
English Русский
Български
Беларускі
Український
Српски
Hrvatski
Română
Polski
Slovenský
Magyar
Bookmark Contacts Articles Sitemap
Company vehicles Peugeot Company vehicles Opel Company vehicles Skoda Company vehicles Land Rover Company vehicles Mitsubishi Company vehicles Volkswagen Company vehicles Honda
RenaultBook.ru


Duster   Fluence   Kangoo   Laguna   Logan   Megane   Sandero   Scenic   Symbol   Clio   Other
Sandero 1 (2007-2012, petrol)

Removal and installation the tailgate (Renault Sandero 1)

  • Main
  • Sandero
  • Sandero 1 (2007-2012, petrol)
  • Body and interior
  • Doors, locks and windows
  • Removal and installation the tailgate
0
Note: The tailgate is quite heavy and bulky, so we recommend removing it with an assistant.


You will need: a flat-blade screwdriver, a 10 mm wrench.
You will need: a flat-blade screwdriver, a 10 mm wrench.


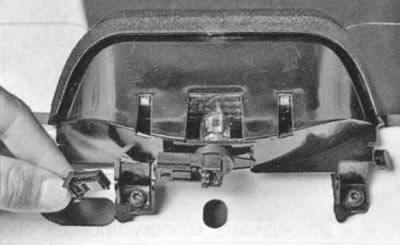
1. Disconnect the additional brake light wiring harness connector (see "Replacing lamps"),
1. Disconnect the additional brake light wiring harness connector (see «Replacing lamps»),


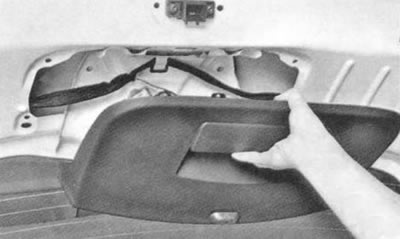
2. Remove the rear door trim (see "Removal and installation the rear door trim"),
2. Remove the rear door trim (see «Removal and installation the rear door trim»),


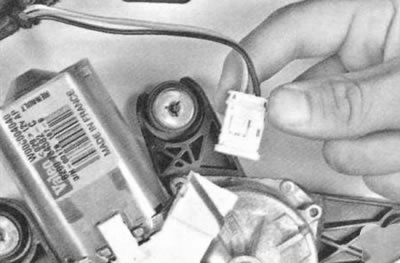
3. Disconnect the wiring harness connector from the rear window wiper motor.


3. Disconnect the wiring harness connector from the rear window wiper motor.


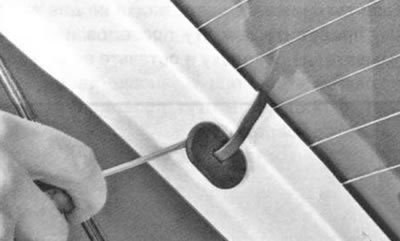
4. Using a screwdriver, pry...
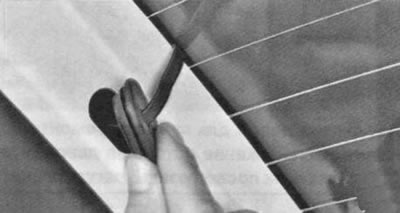
4. Using a screwdriver, pry...


5. ... remove the rubber plug...
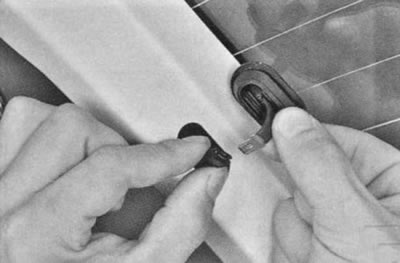
5. ... remove the rubber plug...


6. ...and disconnect the rear window heating wire connector.

7. Similarly, disconnect the rear window heating wire connector on the other side.
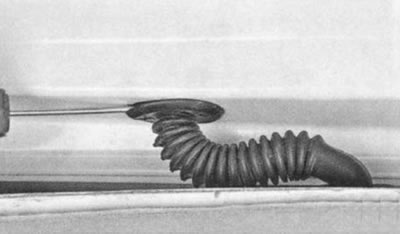
7. Similarly, disconnect the rear window heating wire connector on the other side.


8. Use a screwdriver to pry up the rubber boot of the tailgate wiring harness...
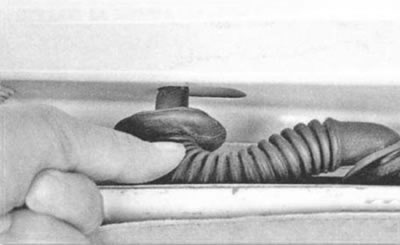


8. Use a screwdriver to pry up the rubber boot of the tailgate wiring harness...


9. ...lead the wiring harness out of the hole in the tailgate and remove it from the hole.

10. Remove the rear window washer hose in the same way.

Note: If you are removing the tailgate for purposes other than replacement, tie a piece of wire to the wiring harness and washer hose and leave it in the tailgate cavity to make it easy to route the wiring harness and washer hose back in when you reinstall the tailgate.
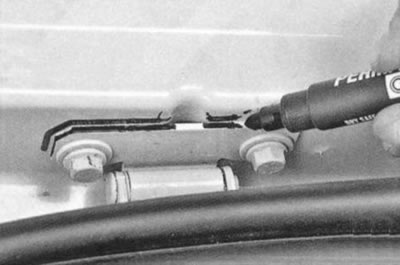

Note: If you are removing the tailgate for purposes other than replacement, tie a piece of wire to…


When removing the door for minor repairs, mark the location of the hinges on the door to avoid having to adjust them later.

11. Remove the tailgate stops (see "Replacing the tailgate stops").
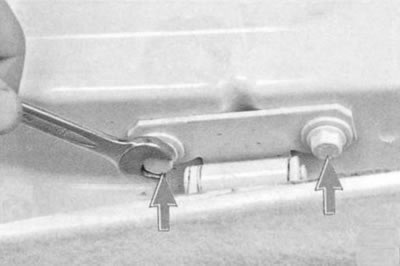
11. Remove the tailgate stops (see «Replacing the tailgate stops»).


(Source link is located on: RenaultBook)


12. Remove the two bolts securing the tailgate to the hinges on each side and remove the tailgate from the vehicle.

13. Install the tailgate in the reverse order of removal.
This article is available on: russian, bulgarian, belarusian, ukrainian, serbian, croatian, romanian, polish, slovak, hungarian
Article has been reviewed by editor: Podkrepilov Maxim
Share with friends:
Previous
Sandero 1: Doors, locks and windows
Next

Replacing the tailgate lock switch
Replacing the tailgate lock and latch
Removal and installation the rear door trim
Replacing the tailgate stops
Removal and installation the rear door
Removal and installation the fuel tank filler pipe hatch cover
Replacement of fixed body glazing
Other articles on other Renault models

➽ Tailgate — Removal and Installation Renault Duster 1 (2009-2017)
➽ Tailgate and trunk lid Renault Fluence 1 (2009-2020, petrol)
➽ Tailgate Renault Kangoo 1 (1997-2007)
➽ Unlocking and locking the side doors and tailgate Renault Laguna 2 (2001-2007)
➽ Removal and installation the tailgate Renault Megane 1 (1995-2002)
Link to this article in different formats
Reviews and comments of visitors
No comments yet


Add two numbers 31 + 11


Sandero 1 (2007-2012, petrol) 
  • General information
  • Structure of car
  • User manual
  • Troubleshooting
  • Maintenance
  • Practical advice
  • Power unit
  • Engine repair
  • Lubrication system
  • Cooling system
  • Fuel and exhaust system
  • Transmission
  • Clutch
  • Manual gearbox
  • Automatic gearbox
  • Drive shafts
  • Chassis, running gear
  • Front suspension
  • Rear suspension
  • Steering
  • Brake system
  • Wheels and tires
  • Body and interior
  • Exterior (external elements)
  • Interior (internal elements)
  • Doors, locks and windows
  • Car body care
  • Heater and air conditioner
  • Security system
  • Electrical equipment
  • Equipment and devices
  • Headlights and lighting
  • Power devices
  • Ignition system
  • Electrical diagrams
RenaultBook.ru © 2018–2026 | Mobile version | News and articles | Sitemap: EN BG BY UA RS HR RO PL SK HU | Administration | Site search | Bookmark
Duster 1 (2009-2017) | Fluence 1 (2009-2020, petrol) | Kangoo 1 (1997-2007) | Laguna 2 (2001-2007) | Logan 1 (2004-2012, petrol) | Logan 2 (2012-2020) | Megane 1 (1995-2002) | Megan 2 (2002-2009, petrol) | Sandero 1 (2007-2012, petrol) | Scenic 1 (1996-2003) | Symbol 1 (1999-2008, petrol) | Symbol 2 (2008-2013, petrol) | Renault 19 (1988-1996) | Espace I and II (1984-1996) | Espace III (1996-2002) | Clio 1 (1990-1998) |
We want your visit to be comfortable 😌 and use cookies 🍪 to do so.