
Removing
1. Remove the trim of the middle pillar (B-pillars).
2. Unscrew the bolt A, disconnect the fasteners B and remove the seat belt (see illustration).
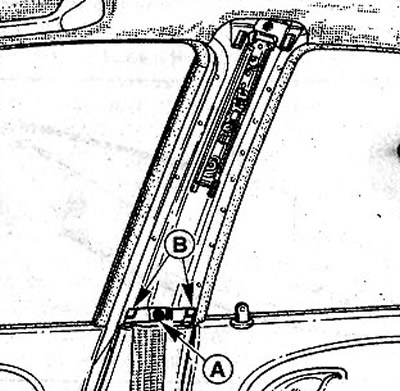
27.2 Unscrew bolt A, disconnect fasteners B and remove the seat belt
3. Remove the door seal from the crease near the detachable trims.
4. Release the back cover from the clamps C by hand and pull it up (see illustration).
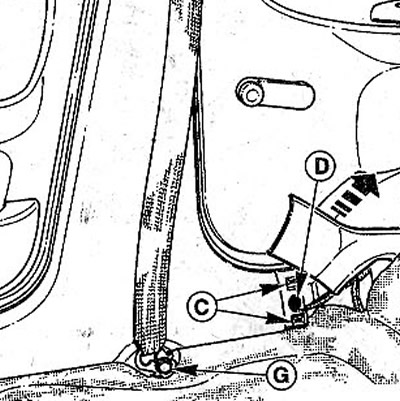
27.4 Use your hand to release the rear trim from the clamps C and lift it up
5. Unscrew bolt D (see illustration 27.4).
6. Unscrew the bolt Fastening the lower seat belt bracket (see illustration 27.4).
7. Release the pad with your hands from the retainers E, starting from the back of the pad (see illustration).
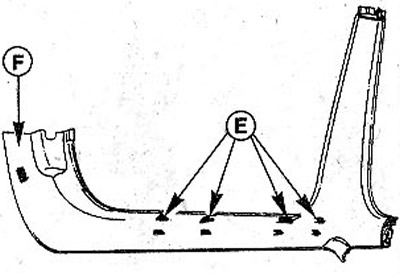
27.7 Release the trim with your hands from the retainers E, starting from the back of the trim
8. Release the trim from the retainer F and remove it.
Installation
9. Fasten the seat belt, and then fasten the pad into the clips and screw on.
10. Screw the lower and upper seat belt brackets with bolts with a tightening torque of 25 Nm.
11. Establish into place an overlay of an average rack.
12. Replace the door seal.
SCENIC cars
To remove the sill lining, the same steps are performed as when removing the sill lining for vehicles with a body «sedan». Below is the procedure for removing the threshold lining itself.
13. Unscrew the screw B and remove the trim A (see illustration).
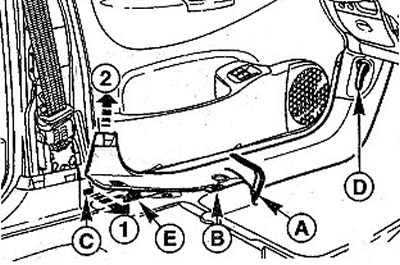
27.13 Unscrew screw B and remove trim A
14. Remove the clamp D of the hood lock opening handle using pliers (see illustration 27.13).
15. Disconnect the trim at point C and move a little inside the cabin (see arrow 1 in illustration 27.13).
16. Carefully lift the pad, pushing it in the direction of arrow 2, and release from the clamps E, first the rear end, and then the front (see illustration 27.13).
17. Remove the cover of the hood opening handle.