
Removing
1. Open the trunk lid and partially remove the rubber seal.
2. Remove the middle part of the rear shelf.
3. Tilt the back of the rear seat forward.
4. Disconnect the wires from the speakers and unscrew the four screws B, and then remove the side shelf (see illustration).
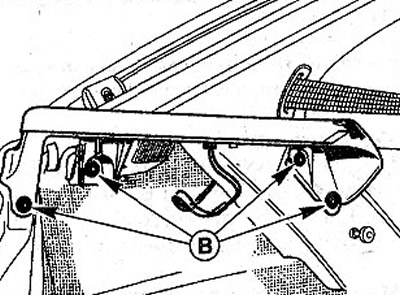
28.4 Disconnect the wires from the speakers and unscrew the four screws B, and then remove the side shelf
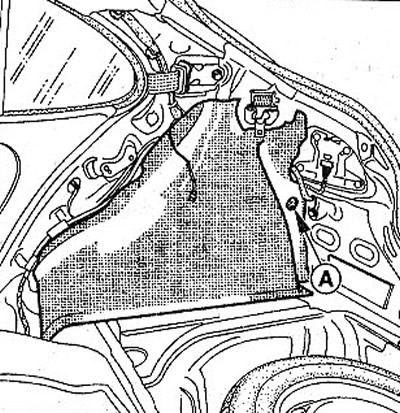
5. Unscrew the latch A of the seat back (see illustration).
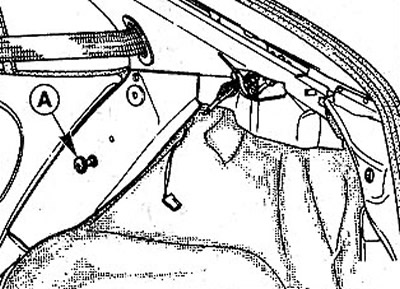
28.5 Unscrew lock A of the seat back
6. Remove the bottom part of facing of a back rack. This will disconnect the three clamps B (see illustration).
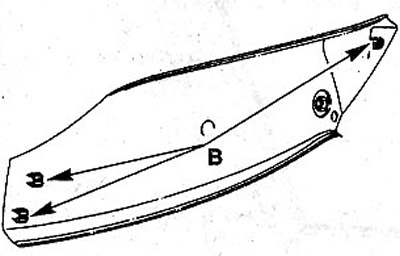
28.6 Remove the lower part of the rear pillar trim
7. Unscrew the screws A and B fastening the rear door sill lining (see illustration).
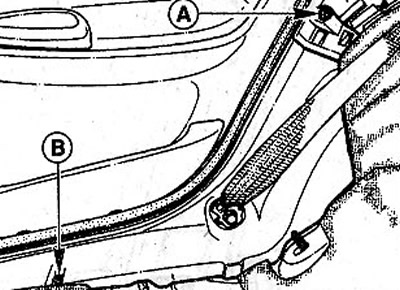
28.7 Unscrew the screws A and B fastening the rear door sill lining
8. Lift up a back seat and unscrew a bolt of fastening of a back seat belt.
9. Remove an overlay of a threshold. This will release the fasteners.
10. Remove the upper part of the lining of the rear pillar, first disconnecting the clamp A, and then the three clamps B, and release the seat belt from the lining (see illustration).
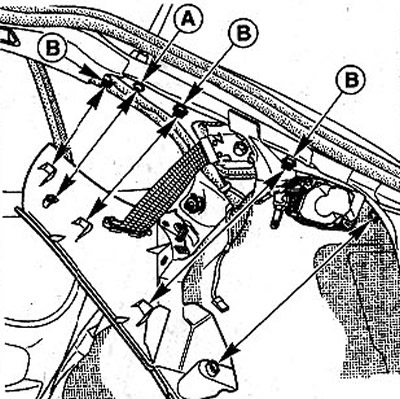
28.10 Remove the upper part of the C-pillar trim by first removing the clip A, and then the three clips B, and release the seat belt from the trim
11. Remove clamps A and remove the cover that covers the spare wheel tray (see illustration).
28.11 Remove clips A and remove the cover that covers the spare wheel tray
Installation
12. Install the spare wheel pan cover.
13. Put in place, fix the rear door sill trim with clamps and screws.
14. Reinstall the top and bottom of the C-pillar trim. Before installing the upper part of the cladding, insert the seat belt into it.
15. Screw in a bolt of fastening of the bottom bracket of a seat belt. The bolt tightening torque is 25 Nm.
16. Screw the latch A back of the rear seat (see illustration 28.7).
17. Attach the side of the rear shelf and secure the speaker wires. When installing the right side of the shelf, remember that the rear seat belt must run on top of the shelf, not under it.
18. Install the middle part of the rear shelf.
19. Replace the rubber seal opening of the trunk lid.