English Русский
Български
Беларускі
Український
Српски
Hrvatski
Română
Polski
Slovenský
Magyar
Bookmark Contacts Articles Sitemap
Company vehicles Peugeot Company vehicles Opel Company vehicles Skoda Company vehicles Land Rover Company vehicles Mitsubishi Company vehicles Volkswagen Company vehicles Honda
RenaultBook.ru


Duster   Fluence   Kangoo   Laguna   Logan   Megane   Sandero   Scenic   Symbol   Clio   Other
Sandero 1 (2007-2012, petrol)

Replacing brake fluid (Renault Sandero 1)

  • Main
  • Sandero
  • Sandero 1 (2007-2012, petrol)
  • Chassis, running gear
  • Brake system
  • Replacing brake fluid
0
According to the manufacturer's recommendation, the brake fluid should be replaced after 6 years of operation or 90 thousand km of mileage (whichever comes first).

Recommendation: Brake fluid is very hygroscopic (absorbs moisture from the air), which, in addition to the appearance of corrosion of brake system parts, lowers the boiling point of the fluid itself, and this can lead to brake failure during frequent intensive braking. Therefore, we recommend replacing the brake fluid at least once every 2 years.


Before replacing the brake fluid, check the hydraulic drive for leaks (see "Checking the tightness of the hydraulic brake drive") and troubleshoot.

You will need: a 8 mm wrench, brake fluid, a rubber or transparent hose, and a transparent container.

Recommendations:
  • It is recommended to replace the brake fluid with an assistant, after first placing the car on an inspection ditch, overpass or lift (no need to remove wheels).
  • Use D0T-4 brake fluid.
  • The order of replacing the fluid in the brake mechanisms:

rear right;

front left;

rear left;

front right.


Warnings:
  • Do not reuse the fluid drained from the system: it is contaminated, saturated with air and moisture. Always add only new fluid of the same brand that was previously poured into the system.
  • Protect the environment! Do not dispose of used brake fluid into the soil or sewer system.

Protect the environment! Do not dispose of used brake fluid into the soil or sewer system.


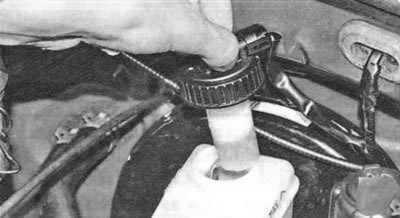
1. Unscrew the cap of the master brake cylinder reservoir.


1. Unscrew the cap of the master brake cylinder reservoir.


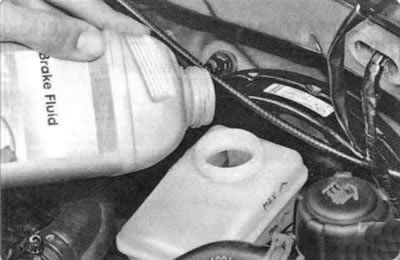
2. Add clean brake fluid to the reservoir up to the lower edge of the filler neck.

Warning. Brake the car with the parking brake and install the anti-rollback stops ("shoes") under the rear wheels.

Warning. Brake the car with the parking brake and install the anti-rollback stops («shoes») under…


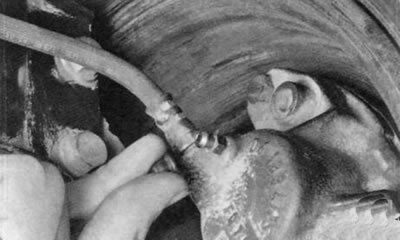
3. Clean the air release valves from dirt and remove the protective caps of the valves of the front wheel cylinders...
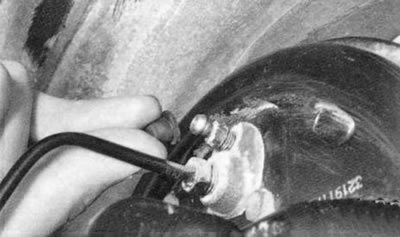
3. Clean the air release valves from dirt and remove the protective caps of the valves of the front…


4. ...and rear brake mechanisms.


4. ...and rear brake mechanisms.


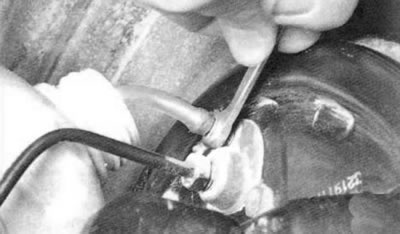
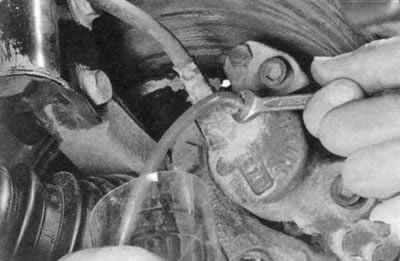
5. Attach the rubber hose to the right rear brake bleeder valve and immerse the end of the hose in a clean, clear container.
5. Attach the rubber hose to the right rear brake bleeder valve and immerse the end of the hose in…


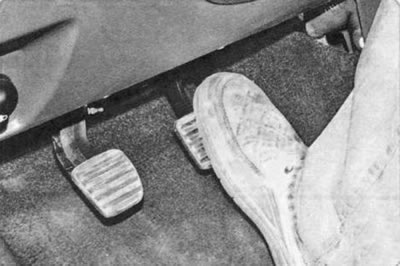
6. The assistant should press the brake pedal sharply four to five times (with an interval between presses of 1-2 s), then keep the pedal pressed.

7. Loosen the air release valve by 1/2-3/4 of a turn. Old (dirty) brake fluid will start to flow out of the hose. At this time, the brake pedal should smoothly reach the stop. As soon as the fluid stops flowing, close the air release valve.

Note. Constantly monitor the fluid level in the reservoir, not allowing it to drop to the "MIN" mark on the reservoir wall. If necessary, add new brake fluid to prevent air from entering the hydraulic drive. This ensures that the old fluid is gradually replaced by the new one without draining the hydraulic system.


Note. Constantly monitor the fluid level in the reservoir, not allowing it to drop to the «MIN»…


8. Replace the brake fluid in the left front brake mechanism in the same way.

9. Replace the fluid in the second circuit in the same way (first in the left rear brake mechanism, then in the right front).

10. Repeat steps 5-7 until the fluid in the drive is completely replaced (clean liquid without air bubbles should flow out of the hose).

11. After replacing the brake fluid, be sure to put the protective caps on the air release valves.

12. Add brake fluid to the level between the "MIN" and "MAX" marks on the tank wall. Screw the tank cap back on.

13. Check the quality of the work performed: press the brake pedal several times - the pedal travel and force on it should be the same with each press. If this is not the case, return to operations 5-9.

14. Install the parts in the reverse order of removal.
This article is available on: russian, bulgarian, belarusian, ukrainian, serbian, croatian, romanian, polish, slovak, hungarian
Article has been reviewed by editor: Podkrepilov Maxim
Share with friends:
Previous
Sandero 1: Brake system
Next

Bleeding the hydraulic brake system
Checking the parking brake
Checking the degree of wear of brake pads, discs and drums
Checking the operation of the brake booster
Checking and adjusting the brake pedal
Master brake cylinder
Replacing the master brake cylinder
Replacing the vacuum booster
Replacing the brake force regulator in the rear brake hydraulic drive
Replacement of hydraulic brake hoses and lines
Other articles on other Renault models

➽ Brake fluid — topping up and replacing Renault Laguna 2 (2001-2007)
➽ Replacing brake fluid Renault Logan 1 (2004-2012, petrol)
➽ Replacing brake fluid Renault Megane 1 (1995-2002)
➽ Replacing brake fluid Renault 19 (1988-1996)
➽ Brake fluid Renault Duster 1 (2009-2017)
Link to this article in different formats
Reviews and comments of visitors
No comments yet


Add two numbers 30 + 36


Sandero 1 (2007-2012, petrol) 
  • General information
  • Structure of car
  • User manual
  • Troubleshooting
  • Maintenance
  • Practical advice
  • Power unit
  • Engine repair
  • Lubrication system
  • Cooling system
  • Fuel and exhaust system
  • Transmission
  • Clutch
  • Manual gearbox
  • Automatic gearbox
  • Drive shafts
  • Chassis, running gear
  • Front suspension
  • Rear suspension
  • Steering
  • Brake system
  • Wheels and tires
  • Body and interior
  • Exterior (external elements)
  • Interior (internal elements)
  • Doors, locks and windows
  • Car body care
  • Heater and air conditioner
  • Security system
  • Electrical equipment
  • Equipment and devices
  • Headlights and lighting
  • Power devices
  • Ignition system
  • Electrical diagrams
RenaultBook.ru © 2018–2026 | Mobile version | News and articles | Sitemap: EN BG BY UA RS HR RO PL SK HU | Administration | Site search | Bookmark
Duster 1 (2009-2017) | Fluence 1 (2009-2020, petrol) | Kangoo 1 (1997-2007) | Laguna 2 (2001-2007) | Logan 1 (2004-2012, petrol) | Logan 2 (2012-2020) | Megane 1 (1995-2002) | Megan 2 (2002-2009, petrol) | Sandero 1 (2007-2012, petrol) | Scenic 1 (1996-2003) | Symbol 1 (1999-2008, petrol) | Symbol 2 (2008-2013, petrol) | Renault 19 (1988-1996) | Espace I and II (1984-1996) | Espace III (1996-2002) | Clio 1 (1990-1998) |
We want your visit to be comfortable 😌 and use cookies 🍪 to do so.